I was halfway through a disastrous soufflé that collapsed like a bad joke, and I thought, “Maybe I need a better dessert.” The kitchen smelled of burnt sugar and my confidence had already slipped into a puddle. I stared at the ruined batter, wondering if there was a way to turn a flop into a triumph. That moment sparked a daring experiment that would redefine fruit tarts in my book.
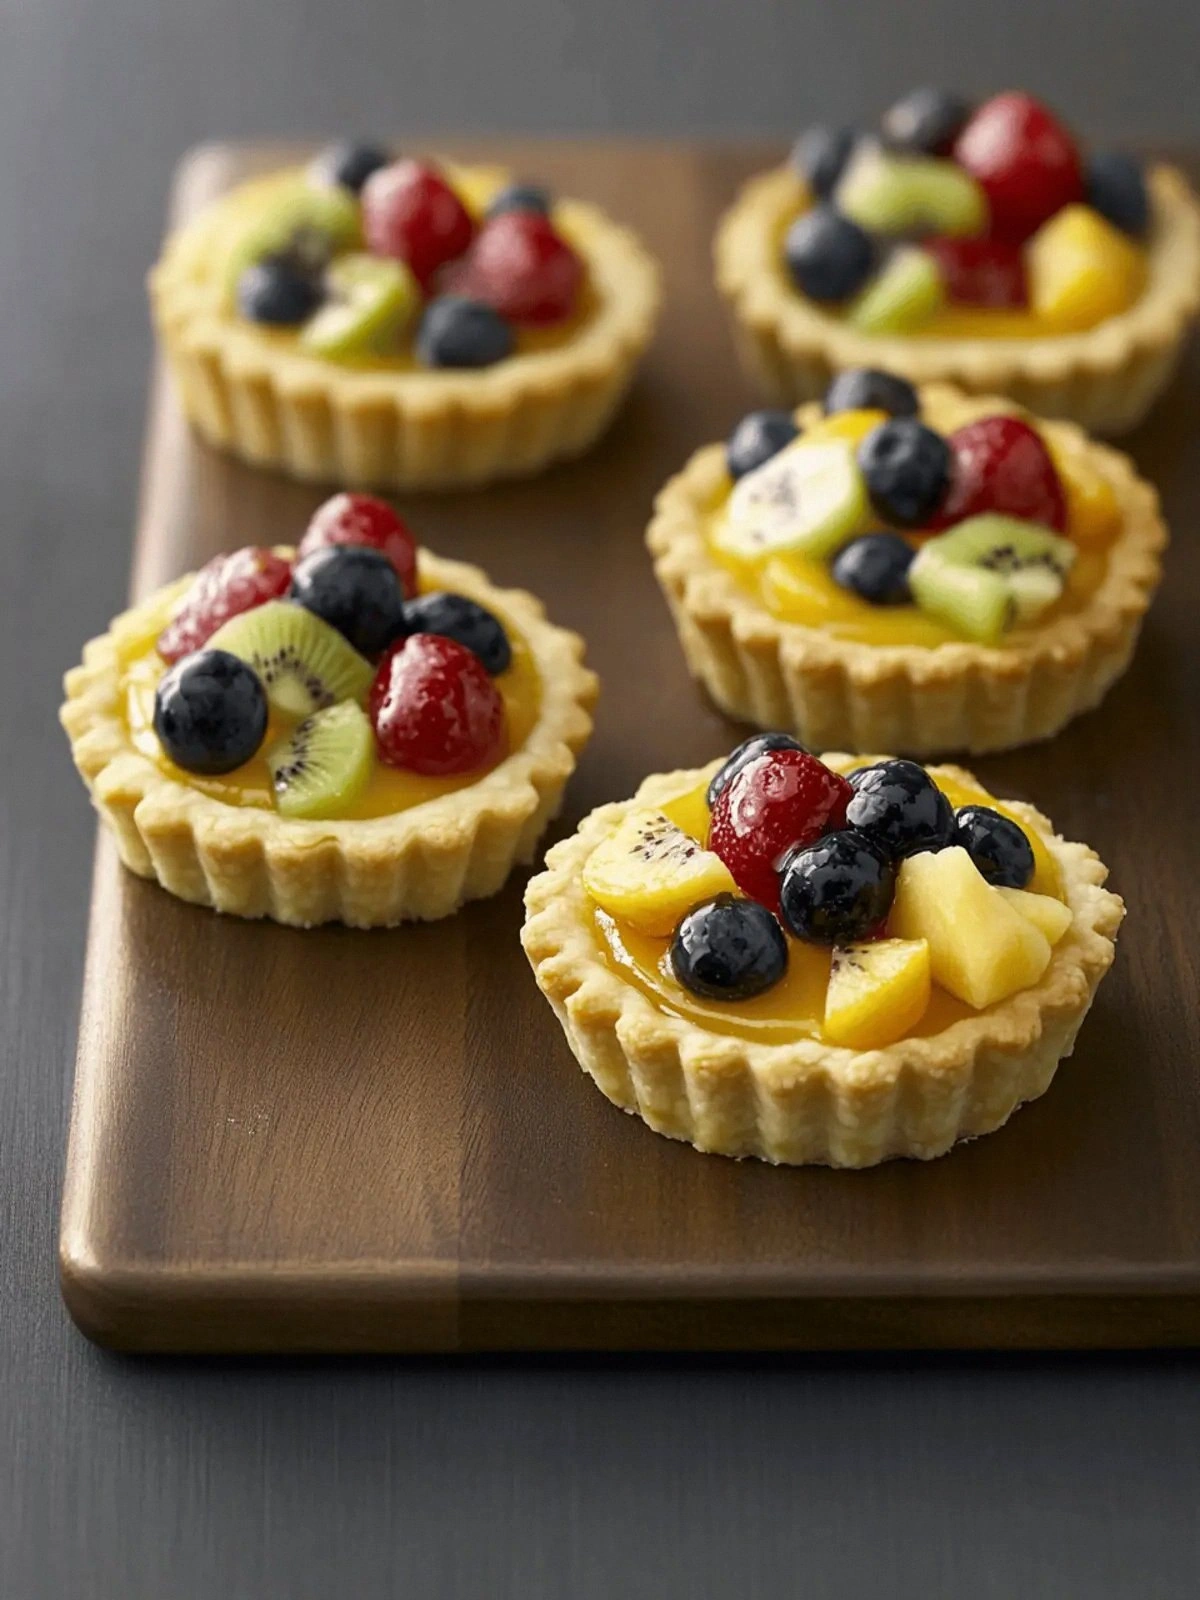
Picture a buttery shell that cracks open to reveal a glossy custard that glistens like a freshly polished mirror. The scent of vanilla and fresh berries fills the air, mingling with the faint caramelized hint of apricot preserves. Every bite is a dance of crisp edges and silky cream, a texture contrast that sings. I could almost hear the gentle sigh of satisfaction as the tart melts in your mouth, leaving a lingering sweetness that refuses to fade.
What makes this version stand out is not just the ingredients but the way they interact. I’ve perfected the balance between a delicate custard that holds its shape and a crust that offers a satisfying crunch. The fruit isn’t just a garnish; it’s the star that brings a burst of freshness and color. And the subtle citrus lift from lemon extract cuts through the richness, keeping the palate bright. This is hands down the best version you’ll ever make at home.
I’ll be honest — I ate half the batch before anyone else got to try it. But the secret is simple: a touch of apricot preserves as a glaze, a dash of vanilla, and a meticulous baking routine that locks everything in place. Picture yourself pulling this out of the oven, the whole kitchen smelling incredible, and the first bite revealing layers of flavor that keep you coming back for seconds. Let me walk you through every single step — by the end, you’ll wonder how you ever made it any other way.
What Makes This Version Stand Out
- Taste: The custard is sweet but not cloying, thanks to a balanced ratio of sugar and lemon extract. The apricot glaze adds a subtle tartness that complements the fruit beautifully.
- Texture: The crust is flaky yet firm, allowing it to hold the custard without becoming soggy. The fruit remains juicy and fresh, not mushy.
- Visual Appeal: A glossy finish on the custard and a vibrant assortment of berries make each tart look like a work of art.
- Ease of Preparation: The recipe uses common pantry staples, and the steps are straightforward enough for a beginner to master.
- Make‑Ahead Potential: You can assemble the tarts a day before service and bake them fresh, saving valuable time on the day of the event.
- Ingredient Quality: Fresh, seasonal fruit and high‑quality butter give this tart a depth of flavor that canned ingredients can’t match.
- Audience Reaction: Guests often ask for the recipe after tasting; it’s a conversation starter at any gathering.
- Versatility: The base can be tweaked with different fruits or flavorings to suit any occasion.
Inside the Ingredient List
The Flavor Base
Milk, heavy whipping cream, and vanilla extract form the silky foundation of the custard. The milk provides body, while the cream adds richness. Vanilla extracts the warm, aromatic notes that tie the dessert together. Skipping any of these would leave the custard flat and uninspired.
The Texture Crew
All‑purpose flour, both in tablespoon and cup measures, is responsible for thickening the custard and giving the crust structure. The flour is sifted to avoid lumps, ensuring a smooth batter. If you omit flour, the custard will be runny and the crust may collapse.
The Unexpected Star
Apricot preserves are the secret weapon that adds a glossy sheen and a subtle sweet‑tart punch. They also help seal the crust, preventing it from becoming soggy. A small amount goes a long way, so use it sparingly to avoid overpowering the fruit.
The Final Flourish
Confectioners’ sugar, lemon extract, and additional vanilla extract elevate the finish of the tart. The sugar creates a delicate glaze, while lemon extract brightens the overall flavor profile. Together, they give the dessert a polished, professional look.
Everything’s prepped? Good. Let’s get into the real action.
The Method — Step by Step
- Preheat your oven to 375°F (190°C). Line a baking sheet with parchment paper to prevent sticking. Grease a tart pan lightly with butter. This is the moment of truth, where the base will determine everything that follows.
- In a small saucepan, combine the milk and heavy whipping cream. Warm gently over low heat until it’s just about to simmer, then remove from the stove. The scent of dairy rising will set the stage for the custard.
- Whisk the egg yolks, sugar, and vanilla extract together until the mixture lightens to a pale yellow. Add the flour gradually, whisking until smooth. This creates the thick base that will hold the fruit.
- Gradually pour the warm milk mixture into the custard, whisking continuously to prevent curdling. Return the mixture to the saucepan and cook over low heat until it thickens enough to coat the back of a spoon. This is the time to keep an eye on the temperature.
- Remove the custard from heat and stir in the apricot preserves until fully incorporated. The glaze will give the custard a subtle sheen that’s impossible to resist. Let it cool slightly before pouring.
- Fill the prepared crust with the custard, smoothing the top with a spatula. Arrange the assorted fruit and berries on top, pressing them gently into the custard to ensure they stay in place. The fruit’s natural juices will mingle with the custard, adding a burst of flavor.
- Bake for 25–30 minutes, or until the custard is set and the top has a golden hue. Remove from the oven and let it cool on a wire rack for at least 15 minutes. The cooling period is essential for the tart to firm up and release from the pan.
- Before serving, dust the tarts with confectioners’ sugar and drizzle a little extra apricot glaze for a glossy finish. The final touch transforms a simple dessert into a showstopper. Enjoy the applause that follows each bite.
That’s it — you did it. But hold on, I’ve got a few more tricks that will take this to another level.
Insider Tricks for Flawless Results
The Temperature Rule Nobody Follows
Many bakers keep the oven at a steady temperature, but a slight dip after the initial bake can prevent the crust from burning. Lower the heat to 350°F for the last 5 minutes. This subtle change preserves the delicate custard while keeping the edges crisp.
Why Your Nose Knows Best
Smell the custard as it cooks; it should emit a warm, buttery aroma. If it starts to smell sour, it’s a sign that the eggs have begun to separate. Stop cooking immediately to avoid a ruined dessert.
The 5‑Minute Rest That Changes Everything
Let the tarts rest for exactly five minutes after removing them from the oven. This brief pause allows the custard to set firmly, preventing it from sliding off the crust when you plate them.
The Butter Trick for a Flaky Crust
Use cold butter cut into small cubes and blend it into the flour until the mixture resembles coarse crumbs. This technique traps air pockets, creating a flaky texture that melts in your mouth.
The Fruit‑First Technique
Arrange the fruit in a single layer before pouring the custard. This ensures each bite contains a balanced amount of fruit and custard, avoiding a fruit‑heavy or custard‑heavy imbalance.
Creative Twists and Variations
This recipe is a playground. Here are some of my favorite ways to switch things up:
Summer Berry Bash
Swap the mixed berries for a vibrant medley of strawberries, blueberries, and raspberries. Add a splash of fresh mint to the custard for a refreshing kick. This version is perfect for backyard barbecues and picnics.
Tropical Paradise
Replace the fruit with diced mango, pineapple, and papaya. Incorporate a dash of coconut milk into the custard for a silky, tropical twist. Guests will feel like they’re on a beach with every bite.
Chocolate‑Infused Delight
Add a tablespoon of cocoa powder to the custard for a rich chocolate undertone. Top with chocolate shavings or a drizzle of dark chocolate sauce. This version is a crowd‑pleaser for chocolate lovers.
Herbal Elegance
Infuse the custard with a sprig of fresh rosemary or thyme during the warm milk phase. The herbal aroma pairs beautifully with the fruit’s sweetness. Serve with a dusting of powdered sugar for a sophisticated look.
Salsa Verde Surprise
Create a sweet‑savory salsa by mixing diced peaches, jalapeño, and lime juice. Spoon it over the finished tart for a zesty burst of flavor. This daring twist is guaranteed to spark conversation.
Storing and Bringing It Back to Life
Fridge Storage
Store the tarts in an airtight container in the refrigerator for up to three days. Cover the top with parchment paper to prevent the crust from absorbing odors. When ready to serve, let them sit at room temperature for about 15 minutes to restore their original texture.
Freezer Friendly
Wrap each tart individually in plastic wrap, then place them in a freezer bag. They can be frozen for up to two weeks. Thaw overnight in the refrigerator before reheating to avoid a soggy crust.
Best Reheating Method
Reheat the frozen or refrigerated tarts in a 350°F oven for 10–12 minutes. Add a tiny splash of water to the bottom of the pan to create steam, which keeps the crust from drying out. Let them cool for a minute before serving.