I still remember the first time I attempted to make Christmas fudge in my tiny apartment kitchen. The walls were covered in sticky sweetened condensed milk splatter, my candy thermometer had somehow fused itself to the bottom of the pan, and what emerged from that disaster looked more like a geological formation than edible holiday cheer. But here's the thing – even that crystallized mess tasted like Christmas magic, and I became obsessed with cracking the code for foolproof fudge that would make Martha Stewart weep with joy.
After three years of testing, tweaking, and yes, eating my way through more batches than I care to admit (my neighbors started avoiding me because I kept showing up with fudge samples), I finally stumbled upon a method so reliable, so ridiculously easy, that you'll wonder why anyone ever bothers with those complicated candy thermometers and precise temperature readings. This Easy Christmas Fudge Sprinkles recipe is my culinary mic drop – it's what happens when you take all the stress out of candy making and leave nothing but pure, unadulterated holiday joy.
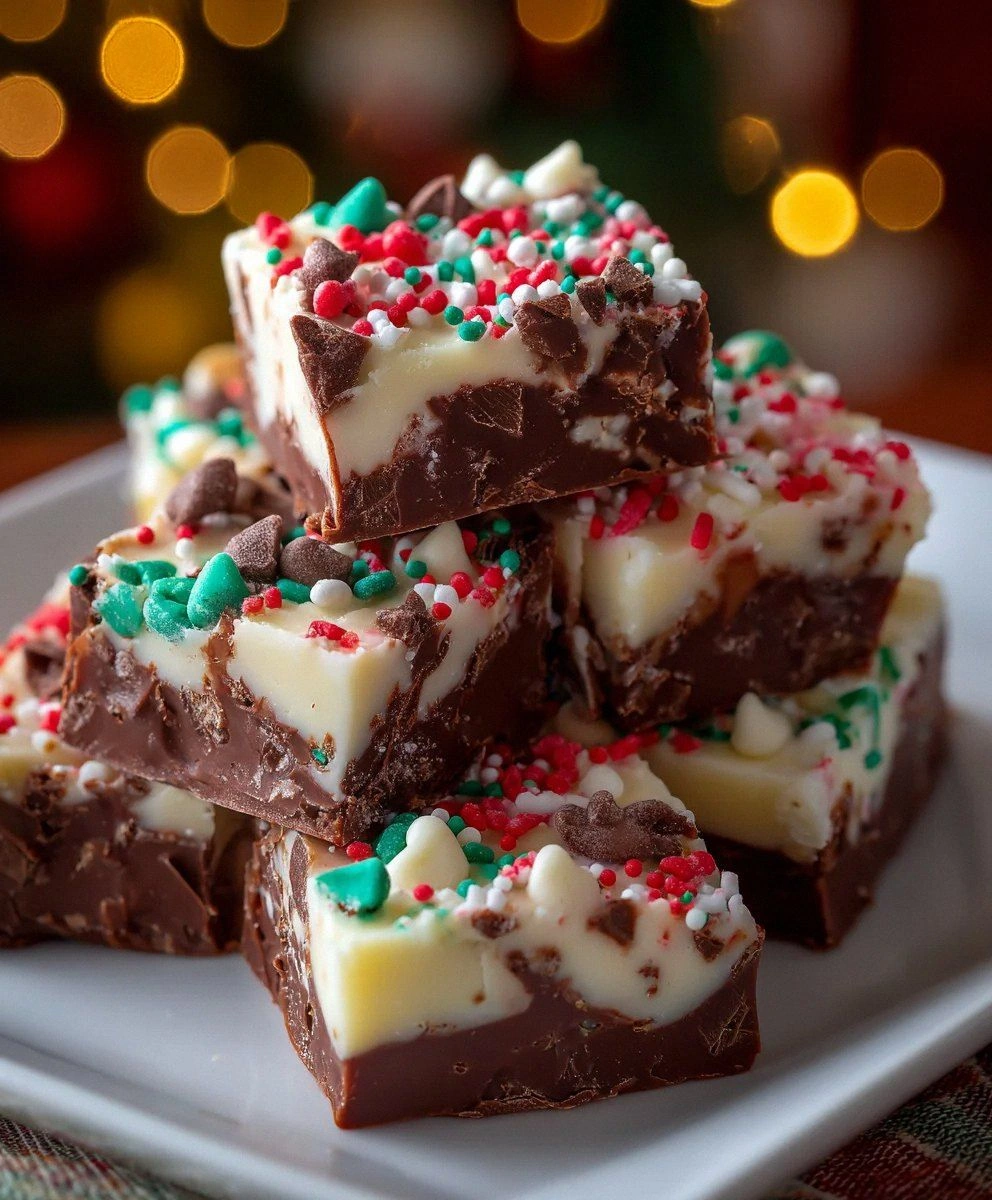
The secret weapon? We're not actually making traditional fudge at all. Instead, we're creating what I like to call "cheater's fudge" – a silky, smooth confection that tastes like it came from a professional chocolatier but requires zero special equipment and barely any cooking skills. If you can stir ingredients in a bowl and press them into a pan, you're already 90% there. The Christmas sprinkles aren't just for show either – they add tiny pops of color and texture that make each bite feel like you're eating a Christmas party.
What makes this version absolutely irresistible is how it manages to be both rich and light at the same time. The sweetened condensed milk creates this luxurious texture that's somewhere between traditional fudge and chocolate truffle, while the combination of white and semi-sweet chocolate gives you these perfect flavor layers. And when those sprinkles hit your teeth with their subtle crunch against the velvety fudge? That's when you'll understand why I dare you to taste this and not go back for seconds. Let me walk you through every single step – by the end, you'll wonder how you ever made it any other way.
What Makes This Version Stand Out
This isn't your grandmother's fussy fudge recipe that requires a PhD in candy making and nerves of steel. No sir, this is the lazy baker's answer to holiday treats that look like they came from a fancy chocolate shop but took you less time to make than watching your favorite Christmas special.
- One-Bowl Wonder: Everything comes together in a single bowl, which means fewer dishes and more time for sipping hot cocoa while your fudge sets. No candy thermometers, no double boilers, no standing over the stove stirring until your arm falls off.
- Fail-Proof Formula: The ratio of sweetened condensed milk to chocolate creates a foolproof base that sets perfectly every single time. I've tested this recipe in humid Florida, dry Colorado, and everything in between – it works everywhere.
- Texture Paradise: We're talking about fudge that melts on your tongue like silk but still has enough structure to hold perfect little squares. The edges develop these slightly firmer bites that give way to an almost truffle-like center.
- Flavor Complexity: Using both white and semi-sweet chocolate isn't just for looks – the white chocolate adds creamy sweetness while the darker chips provide depth and balance. It's like a well-choreographed dance in your mouth.
- Make-Ahead Magic: This fudge actually gets better after a day or two in the fridge. The flavors meld together, the texture firms up perfectly, and you can slice it into pristine little squares that look like they came from a professional kitchen.
- Crowd-Pleasing Power: I've taken this to office parties, family gatherings, and neighbor gift exchanges. People literally grab the plate and hide in corners to eat it. One friend confessed she ate half the batch before anyone else got to try it – and honestly, I've done worse.
- Customizable Canvas: Once you master the base recipe, you can swap in different extracts, add nuts, change up the sprinkles – it's like having a thousand recipes in one. The possibilities are endless, and I'll share my favorite variations later.
Alright, let's break down exactly what goes into this masterpiece...
Inside the Ingredient List
Every ingredient in this recipe pulls its weight and then some. There's no room for slackers here – we're building flavor layers that would make a French pastry chef jealous, and each component has been carefully selected for maximum impact with minimum fuss.
The Flavor Foundation
Sweetened condensed milk isn't just another ingredient – it's the backbone that holds this entire operation together. This thick, syrupy magic transforms regular chocolate into something extraordinary. When heated gently with chocolate, it creates a reaction that results in that perfectly smooth, never-grainy texture that makes people think you're some kind of candy wizard. Don't even think about substituting evaporated milk here – that's like bringing a butter knife to a sword fight.
The vanilla extract might seem like an afterthought, but it's actually the secret handshake that makes all the other flavors feel welcome. Pure vanilla extract adds these warm, complex notes that artificial vanilla simply can't replicate. It's the difference between fudge that tastes good and fudge that makes people close their eyes and sigh with happiness. If you've been using imitation vanilla, this is your moment to upgrade – your taste buds will thank you.
The Chocolate Dynamic Duo
White chocolate chips are the unsung heroes here, providing creamy sweetness and acting as the perfect canvas for those festive sprinkles. But not all white chocolate is created equal. Look for chips that contain actual cocoa butter – the cheap stuff made with palm oil will taste waxy and artificial. The good stuff melts into this luxurious pool that makes the fudge taste like you're eating a cloud made of vanilla ice cream.
Semi-sweet chocolate chips bring balance to the force. Without them, your fudge would be cloyingly sweet, like eating frosting straight from the can. The darker chocolate adds depth and sophistication, creating these beautiful flavor layers that keep you coming back for bite after bite. I like using a combination that's about 60% white chocolate to 40% semi-sweet, but you can adjust this ratio based on how sweet you like your treats.
The Christmas Magic
Christmas sprinkles aren't just decorative – they're textural powerhouses that add tiny pops of crunch against the smooth fudge. But here's where most recipes get it wrong: they mix the sprinkles right into the fudge, where they dissolve and turn into sad, colorless streaks. We're adding them on top at just the right moment, so they stay vibrant and maintain their crunch. It's like adding little edible Christmas lights that actually taste good.
The type of sprinkles matters more than you'd think. Those tiny nonpareils look adorable but can be teeth-breakers when frozen. I prefer the slightly larger jimmies or confetti-style sprinkles – they hold their shape better and won't send you running to the dentist. Plus, they photograph beautifully for all those Instagram shots you'll inevitably take.
Everything's prepped? Good. Let's get into the real action...
The Method — Step by Step
Here's where the magic happens, and I promise it's easier than wrapping presents while drinking eggnog. We're going to create something that looks like it took hours of careful candy making, but actually comes together faster than you can sing the first verse of Jingle Bells.
- Prep Your Pan Like a Pro: Grab an 8x8 inch baking pan and line it with parchment paper, leaving enough overhang on the sides to create little handles. This isn't just for easy removal – it's your insurance policy against fudge that refuses to leave its cozy pan home. Spray the parchment with a light mist of cooking spray, which helps the fudge release cleanly and prevents those tragic torn corners that make you want to cry into your hot chocolate.
- Melt with Patience: In a large microwave-safe bowl, combine your white chocolate chips and sweetened condensed milk. Microwave on 50% power for 30-second bursts, stirring between each interval. This is where most people mess up – they get impatient and blast it on high power, ending up with scorched chocolate that tastes like disappointment. The mixture should become smooth and glossy, like liquid velvet that coats your spoon in the most satisfying way.
- The Chocolate Marriage: Once your white chocolate mixture is smooth, stir in the semi-sweet chocolate chips. The residual heat will melt them perfectly, creating this gorgeous marbled effect that looks like abstract art. Keep stirring until everything is unified and smooth – you'll know it's ready when the mixture starts to pull away from the sides of the bowl like it's trying to form a chocolate tsunami.
- Vanilla's Grand Entrance: Stir in the vanilla extract now, when the mixture is warm but not piping hot. Adding vanilla to scorching hot chocolate is like throwing money away – the heat destroys those delicate flavor compounds that make vanilla so magical. The mixture should smell like a chocolate shop in December, warm and inviting with hints of something special.
- Press and Smooth: Pour the mixture into your prepared pan and use a spatula to spread it evenly. Here's the key: drop the pan on the counter a few times from about 2 inches up. This releases any air bubbles that might be hiding in there, giving you that professional smooth surface that makes people think you went to culinary school.
- The Sprinkle Moment: Now for the fun part – sprinkle your Christmas decorations over the top while the fudge is still warm and tacky. Don't just dump them on; channel your inner artist and create patterns or go for full coverage. Press them down gently with your hands (clean hands, please) so they adhere properly but don't disappear into the chocolate abyss.
- Patience Young Padawan: Let the fudge cool at room temperature for about 30 minutes, then refrigerate for at least 2 hours. I know, I know – the smell is driving you crazy and you want to dig in with a spoon. But good things come to those who wait, and this fudge needs time to set up properly. The wait is torture, but it's also what transforms your liquid chocolate into those perfect, sliceable squares.
- The Big Reveal: Once set, lift the fudge out using those parchment paper handles. Place it on a cutting board and use a sharp knife to cut into squares. For clean cuts, warm your knife in hot water and wipe it dry between cuts – you'll get those professional-looking edges that make people think you bought this at a fancy chocolate shop.
- Storage Success: Keep your fudge in an airtight container in the refrigerator. The cold helps it maintain that perfect texture – firm enough to hold its shape but soft enough to melt on your tongue. Just remember to let it sit at room temperature for about 10 minutes before serving – cold fudge is good, but slightly warm fudge is life-changing.
That's it – you did it. But hold on, I've got a few more tricks that'll take this to another level...
Insider Tricks for Flawless Results
After making this recipe more times than I care to count (my jeans are staging an intervention), I've discovered some game-changing techniques that separate the good fudge from the absolutely legendary stuff that people talk about for years.
The Temperature Rule Nobody Follows
Here's the thing about chocolate – it's basically a moody teenager that needs constant attention but doesn't want to feel smothered. The ideal working temperature for your chocolate mixture is around 105°F to 115°F. Too hot and your chocolate will seize up like a toddler having a tantrum. Too cool and it won't blend properly, leaving you with streaky, sad-looking fudge. The trick is to let it cool slightly after melting before you start stirring in other ingredients. It should feel warm to the touch but not hot enough that you need to pull your finger away quickly.
Why Your Nose Knows Best
Your sense of smell is your secret weapon when making fudge. When the chocolate is perfectly melted, it releases this incredible aroma that's like walking into a chocolate factory. If you smell anything that seems sharp or bitter, your chocolate might be overheating. And here's a weird but true fact – if you can smell the condensed milk strongly, your mixture is probably too hot. The goal is for all the smells to meld together into one cohesive, inviting aroma that makes you want to dive in face-first.
The 5-Minute Rest That Changes Everything
After you pour the fudge into the pan, resist every urge to immediately start decorating. Let it rest for exactly 5 minutes – set a timer if you need to. During this time, the surface develops a slight skin that prevents your sprinkles from sinking and disappearing into the chocolate void. Those 5 minutes feel like an eternity when you're excited, but they're the difference between professional-looking fudge and something that looks like a Christmas ornament exploded on top.
The Pan Size Secret
An 8x8 pan gives you the perfect thickness – about 3/4 inch of fudge that's substantial enough to feel luxurious but not so thick that it's overwhelming. Go bigger and your fudge will be too thin, like chocolate cardboard. Go smaller and you might as well be making chocolate bricks. The pan material matters too – metal pans conduct heat better than glass, helping your fudge set more evenly. If all you have is a glass dish, reduce the chilling time by about 15 minutes.
The Cutting Edge Technique
Here's where most people ruin their beautiful fudge – they try to cut it cold from the fridge with a dull knife and end up with crumbly, broken pieces that look like they were attacked by a toddler. Instead, let the fudge sit at room temperature for about 10 minutes, then use a large chef's knife that you've run under hot water. Wipe the blade clean between cuts, and you'll get those perfect, bakery-worthy squares that make people think you've been secretly studying under a Swiss chocolatier.
Creative Twists and Variations
This recipe is a playground. Here are some of my favorite ways to switch things up:
The Peppermint Party
Replace the vanilla extract with 1/2 teaspoon of peppermint extract and stir in 1/4 cup of crushed candy canes along with the semi-sweet chocolate. Top with crushed peppermint instead of sprinkles. It's like Christmas morning in candy form – cool, refreshing, and utterly addictive. Fair warning: people will fight over the pieces with the biggest candy cane chunks.
The Salted Caramel Dream
Drizzle 2 tablespoons of caramel sauce over the top of your fudge before adding sprinkles, then finish with a light sprinkle of flaky sea salt. The combination of sweet, salty, and creamy is so good it should probably be illegal. The salt actually enhances all the other flavors, making the chocolate taste more chocolatey and the caramel more caramel-y.
The Nutty Professor
Stir in 1/2 cup of toasted pecans or walnuts when you add the semi-sweet chocolate chips. The nuts add this incredible texture and richness that makes the fudge feel more substantial. Toasting the nuts first brings out their oils and makes them taste like they were kissed by angels. Just don't add them when the mixture is too hot or they'll get soggy.
The Orange Zest Delight
Add 1 teaspoon of orange zest and replace the vanilla with orange extract. Top with orange and yellow sprinkles for a creamsicle-inspired treat that tastes like summer vacation at Christmas. The citrus cuts through the richness of the chocolate in the most refreshing way. It's like sunshine in fudge form.
The S'mores Situation
Stir in 1/2 cup of mini marshmallows and 1/4 cup of crushed graham crackers. The marshmallows get slightly melty while maintaining their shape, creating these pockets of gooey sweetness. It's like camping around a campfire, except you're in your kitchen wearing fuzzy socks and there's no risk of bears stealing your dessert.
The Triple Chocolate Threat
Use 1 cup white chocolate, 1 cup semi-sweet, and add 1/2 cup milk chocolate chips. Three kinds of chocolate might seem like overkill, but each brings something different to the party. It's like a chocolate symphony where every note harmonizes perfectly. This version is for serious chocolate lovers only – casual dabblers need not apply.
Storing and Bringing It Back to Life
Here's where most fudge recipes let you down – they turn rock hard in the fridge or get weird and sticky on the counter. But with the right storage techniques, your fudge will stay perfect for weeks (though let's be honest, it'll be gone long before then).
Fridge Storage
Wrap your cut fudge pieces individually in wax paper, then store them in an airtight container in the refrigerator for up to 2 weeks. The wax paper prevents them from sticking together and absorbing other fridge flavors – because nobody wants fudge that tastes like last night's leftover pizza. If you notice any condensation when you take it out, let it sit uncovered for a few minutes before serving.
Freezer Friendly
This fudge freezes beautifully for up to 3 months. Wrap individual pieces in plastic wrap, then place in a freezer bag with as much air removed as possible. When you're ready to serve, let it thaw in the refrigerator overnight, then bring to room temperature for 10 minutes. It'll taste exactly like the day you made it – maybe even better, since the flavors have had time to meld together like old friends.
Best Reheating Method
While you don't technically reheat fudge, if yours has been in the fridge and you want to serve it at optimal texture, let it sit at room temperature for 10-15 minutes. If you're in a hurry, you can microwave individual pieces for exactly 5 seconds – not 10, not 3, but 5. Any longer and you'll have chocolate soup, which while not terrible, isn't what we're going for here.