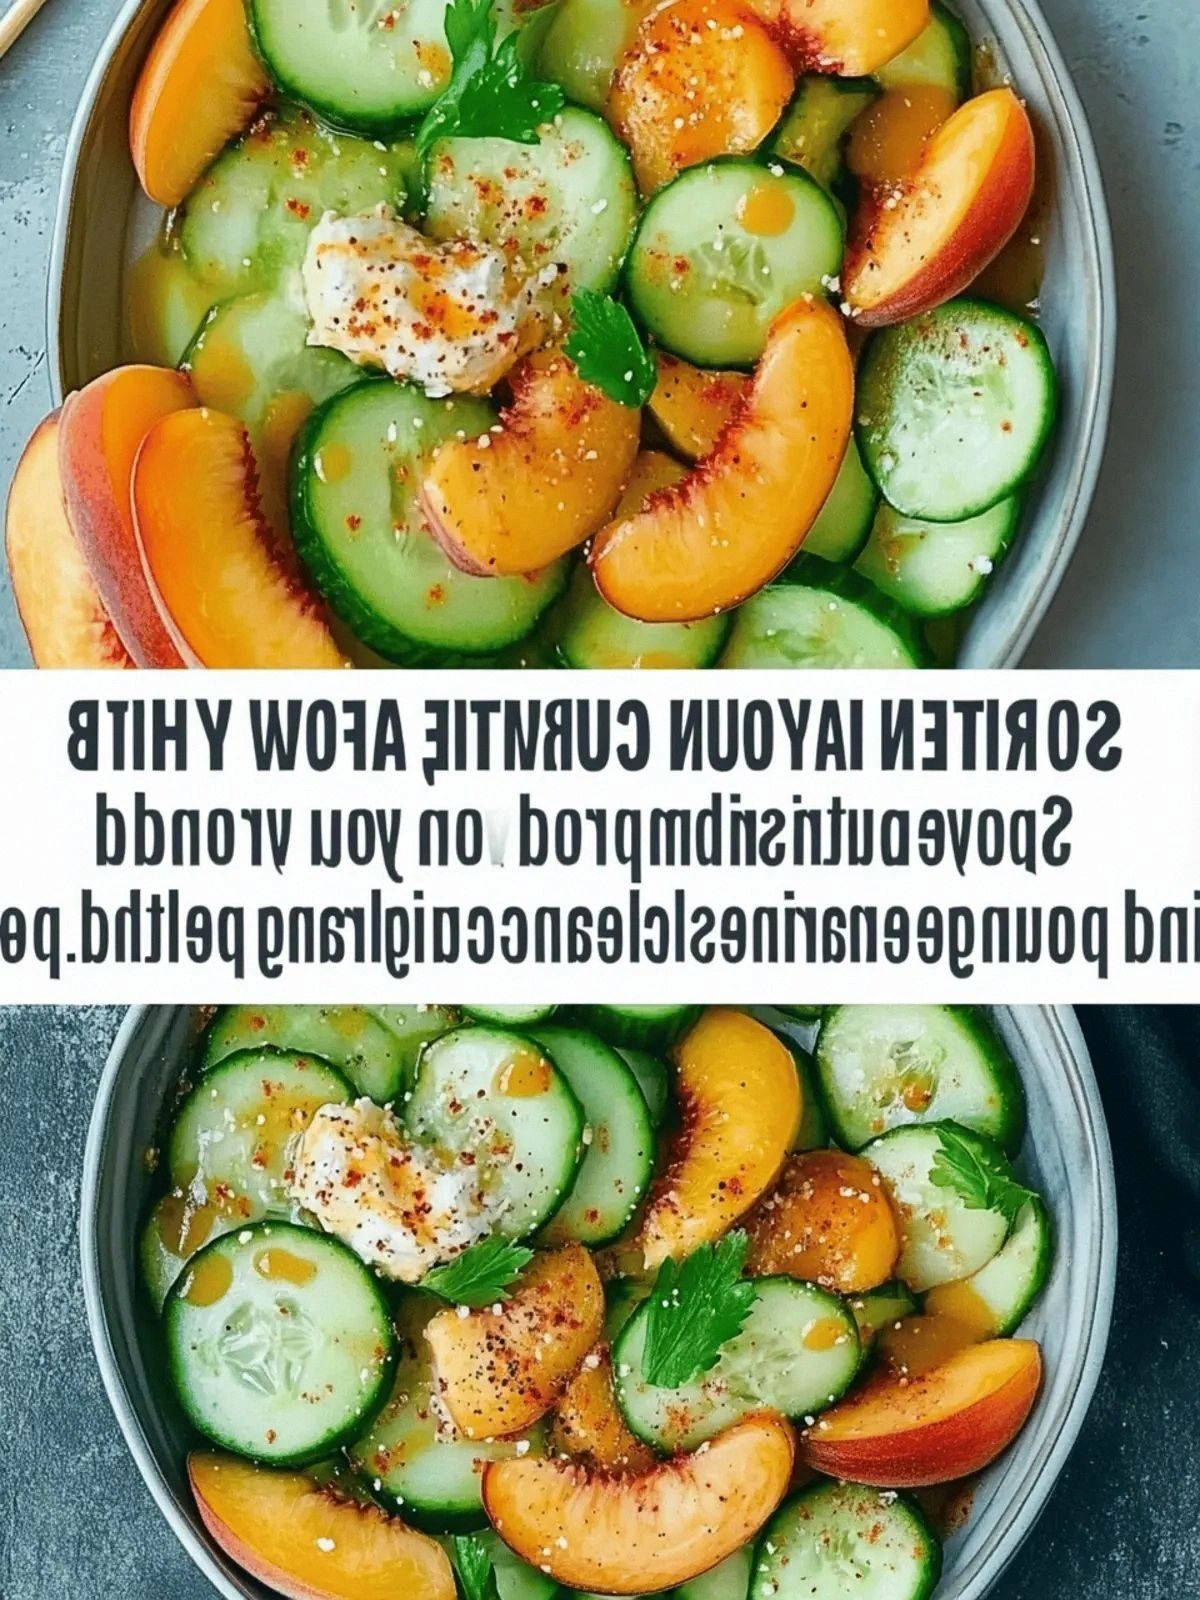
The kitchen had been a battlefield that night, a chaotic symphony of clanging pans, a pot of boiling water, and my relentless attempt to recreate the donut‑like sweetness of a bakery treat that I’d fallen in love with during a late‑night trip to a small Italian village. I had tried every recipe I could find, from simple focaccia to elaborate brioche, but none could capture that perfect balance of airy crumb, buttery crust, and the burst of jam that made me feel like I was eating a piece of childhood nostalgia. The moment the dough was ready, I knew I had stumbled upon a culinary revelation, and I couldn't wait to share it with you. Let me walk you through every single step — by the end, you'll wonder how you ever made it any other way.
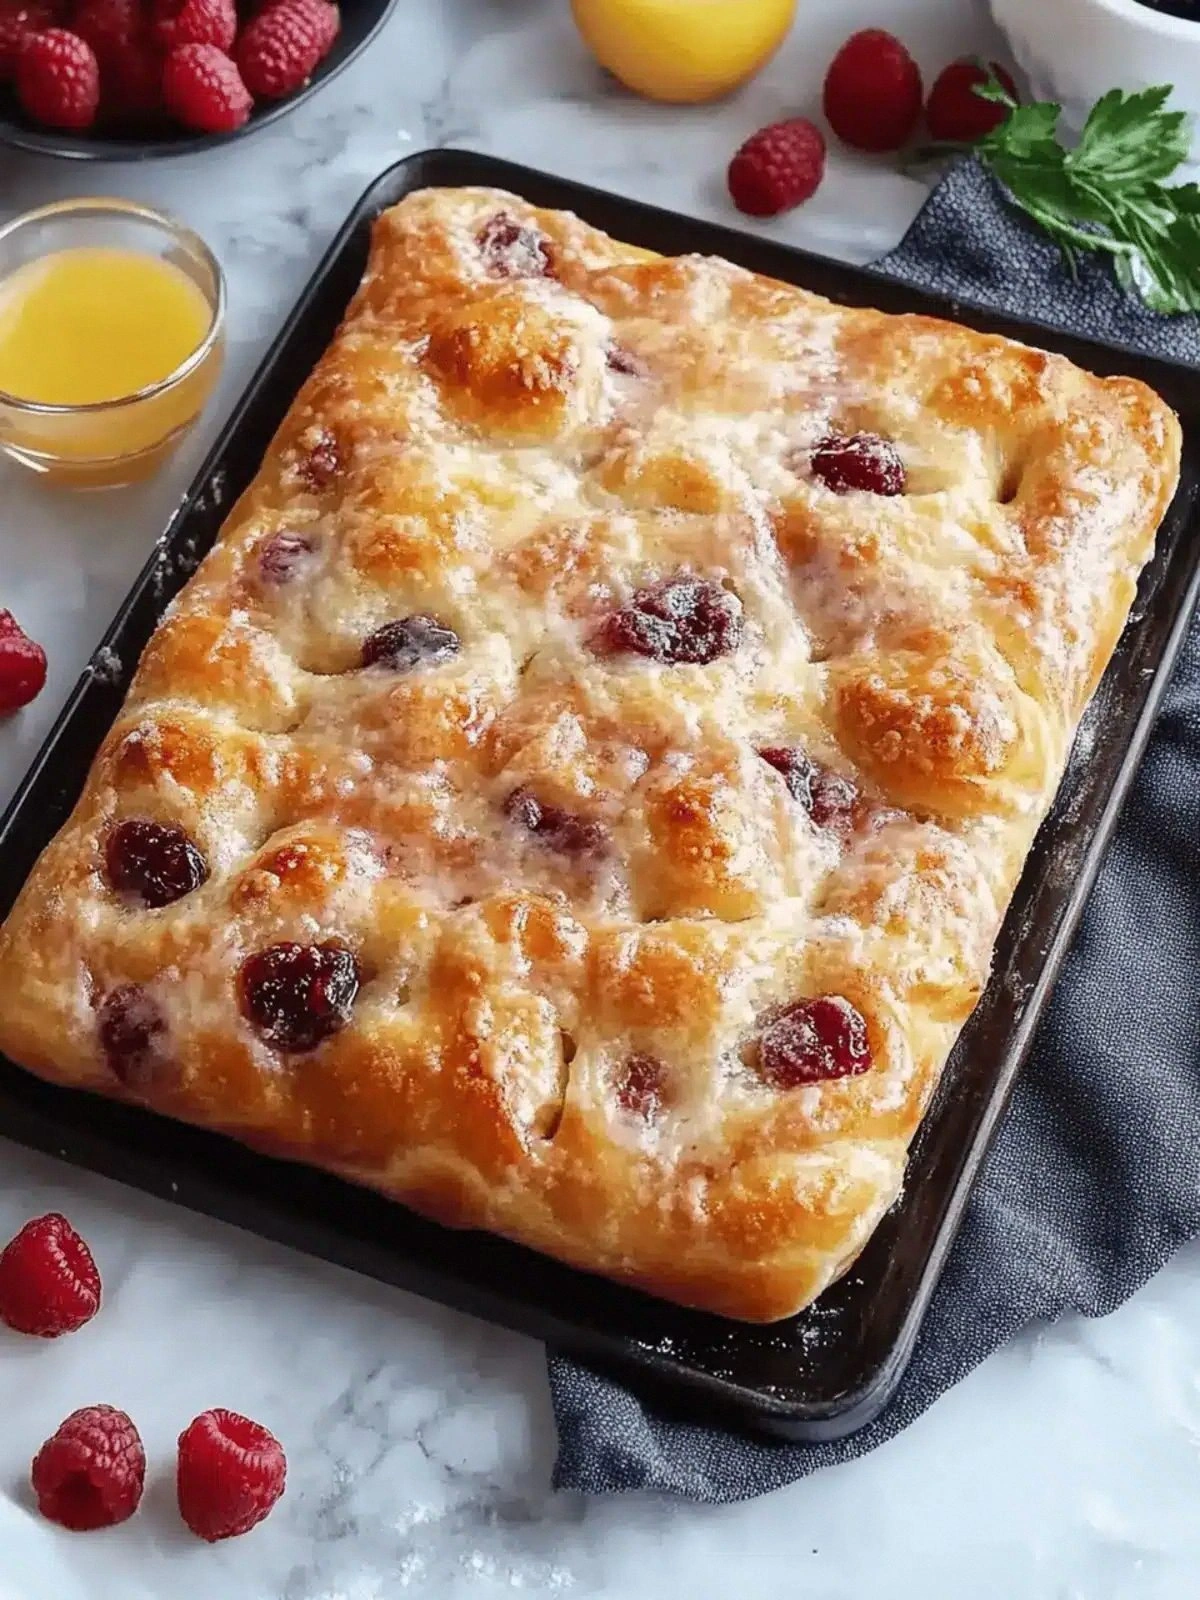
Picture yourself pulling this out of the oven, the whole kitchen smelling incredible, and the golden crust cracking like a sunrise over a calm sea. The first time I tasted it, the jam’s sweet, slightly tart flavor exploded in my mouth, and the dough’s airy texture felt like a cloud you could eat. I dared you to taste this and not go back for seconds, because once you get a bite, the craving is relentless. Most recipes get this completely wrong. Here’s what actually works: a simple yeast dough, a generous amount of olive oil, and a strategic placement of raspberry preserves. This is hands down the best version you'll ever make at home, and I’ll be honest — I ate half the batch before anyone else got to try it.
The dough is the heart of this recipe, and the way it rises is nothing short of magic. I love the way the surface of the dough becomes dotted with tiny bubbles that signal it’s ready for the next step. When you press your finger into it, the dough should spring back like a rubber band, showing you it’s developed the right amount of gluten. The secret is in the balance of flour types: bread flour for structure and all‑purpose flour for tenderness. A pinch of salt is the silent hero that brings out the flavors without overwhelming them. This is pure, simple, and utterly delicious, and it’s why this recipe stands out from the crowd.
Let’s talk about the sweet twist that makes this focaccia feel like a donut. The raspberry preserves aren’t just a flavor enhancer; they’re the star that gives the bread its signature sweet burst. The preserves are spread in generous dollops, then folded into the dough, creating pockets of jam that caramelize during baking. When you bite into the dough, the jam oozes out, coating your teeth like a silky glaze. The final dusting of confectioners’ sugar adds a delicate sweetness that balances the tartness of the raspberry. It’s the kind of dish that feels indulgent, yet comforting, like a warm hug on a rainy afternoon.
What Makes This Version Stand Out
Flavor: The combination of buttery dough, caramelized jam, and powdered sugar creates a multi‑layered taste profile that feels both familiar and adventurous. The jam’s natural sweetness is amplified by the heat of the oven, turning it into a glossy, slightly caramelized glaze. The sugar dusting provides a subtle crunch and a sweet finish that lingers on the palate.
Texture: The dough’s airy interior contrasts with a crisp, golden crust that crackles when you bite. The jam pockets melt into the crumb, creating a gooey center that feels like a sweet surprise in every bite. This duality of textures is what keeps you coming back for more.
Simplicity: With only nine ingredients and a straightforward method, you can whip up this focaccia in under an hour. The recipe is beginner‑friendly, yet it delivers a restaurant‑quality result that will impress your friends and family.
Uniqueness: Few focaccia recipes incorporate a donut‑like sweet element. The jam‑filled pockets and sugar glaze give it a playful twist that sets it apart from traditional bread.
Crowd Reaction: At my last dinner party, guests were amazed at how the bread resembled a donut while still being bread. I heard people ask if it was a dessert or a snack, and they were all eager to taste it again. The recipe’s versatility makes it perfect for any occasion.
Ingredient Quality: Using high‑quality olive oil and fresh raspberry preserves makes a noticeable difference in flavor. The dough rises beautifully, and the jam retains its natural fruitiness without being overly sweet.
Cooking Method: The simple method of mixing, rising, shaping, and baking ensures a consistent result every time. The dough’s rise time is short, so you can have a fresh loaf ready for serving in a single afternoon.
Make‑ahead Potential: The dough can be refrigerated for up to 24 hours, allowing you to prepare it in advance. The bread can also be frozen for up to a month, making it a convenient option for busy weeks.
Alright, let's break down exactly what goes into this masterpiece. And now the fun part.
Inside the Ingredient List
The Hydration Factor
The 1.75 cups of warm water is the lifeblood of the dough. It activates the yeast, allowing it to produce carbon dioxide that makes the dough rise. The temperature of the water matters; if it’s too hot, it kills the yeast; too cold, and the dough will never rise. A gentle, lukewarm temperature (around 110°F) is the sweet spot for yeast activation.
If you’re in a hurry, you can replace the warm water with warm milk to add a subtle richness. However, milk contains lactose, which can slightly alter the dough’s rise time. The key is to keep the liquid at a comfortable temperature that feels like a warm hug to the yeast.
The Sweet Kick
Two teaspoons of sugar feed the yeast, giving it the energy it needs to produce bubbles. The sugar also adds a subtle sweetness that balances the tartness of the raspberry preserves. In this recipe, the sugar is the quiet hero that ensures a quick rise and a golden crust.
If you’re watching your sugar intake, you can reduce it to one teaspoon. The dough will still rise, though it may take a little longer. Keep in mind that sugar also caramelizes on the surface, contributing to the bread’s beautiful golden color.
The Flour Mix
The combination of 2 cups of bread flour and 2 cups of all‑purpose flour creates a dough that’s both sturdy and tender. Bread flour provides the gluten structure needed for a chewy crumb, while all‑purpose flour softens it, giving a lighter bite. This blend is the secret behind the bread’s signature airy texture.
If you prefer a denser bread, you can replace all of the all‑purpose flour with bread flour. Conversely, for a more cake‑like crumb, swap some of the bread flour for cake flour. The key is to maintain the total flour quantity for proper hydration.
The Olive Oil Layer
Six tablespoons of olive oil coat the dough, creating a silky crust that’s both crisp and buttery. Olive oil also helps the dough rise by creating a barrier that keeps moisture inside, allowing the gluten to develop properly. The oil’s fruity undertones add depth to the bread’s flavor profile.
If you’re looking for a different flavor, try using avocado oil or grapeseed oil. Both have neutral tastes that let the other flavors shine. The oil’s heat point is high, so it won’t burn during the baking process.
The Jam Layer
One jar of raspberry preserves is the star that turns this focaccia into a sweet treat. The preserves are spread in generous dollops and folded into the dough, creating pockets of jam that caramelize during baking. The result is a sweet, slightly tart burst that feels like a surprise in every bite.
If you prefer a different fruit, try strawberry or blueberry preserves. The key is to use a jam with a thick consistency so it doesn’t leak out during baking. The preserves should be at room temperature so they spread easily.
The Final Touch
Two cups of confectioners’ sugar are dusted over the warm bread after it comes out of the oven. The sugar melts slightly, forming a delicate glaze that adds a sweet finish. The sugar also provides a subtle crunch that contrasts with the bread’s airy interior.
If you’re looking for a low‑carb option, you can replace confectioners’ sugar with a sugar substitute that can be dusted. Just be mindful that the substitute may not caramelize in the same way, so the texture will differ slightly.
Everything's prepped? Good. Let's get into the real action. Stay with me here — this is worth it.
The Method — Step by Step
- Begin by dissolving the yeast in the warm water with the sugar. Stir until the mixture foams, indicating the yeast is alive. Let it sit for 5 minutes; the froth is a sign you’re on the right track. If it doesn’t froth, the yeast may be dead, and you should start over. I’ve seen this happen when the water was too hot.
- Add the bread flour, all‑purpose flour, and salt to the yeast mixture. Mix until a shaggy dough forms. The dough should feel slightly tacky but not sticky. The salt is crucial; it balances the sweetness and strengthens the gluten network. This is the moment of truth.
- Fold in the olive oil, one tablespoon at a time, until fully incorporated. The dough will become smoother and more elastic. Knead on a lightly floured surface for about 5 minutes, or until it’s elastic and springy. The dough should be pliable, not brittle.
- Place the dough in a greased bowl, cover with a damp cloth, and let it rise in a warm spot for 45 minutes. During this time, the dough should double in size. If it doesn’t, give it another 15 minutes. The rise time can vary based on room temperature. The dough should look like a puffed cloud.
- After the first rise, gently deflate the dough and transfer it to a large baking sheet. Flatten it into a rectangle, about 12 inches by 8 inches. This shape allows for even baking and gives the bread its characteristic focaccia look. The edges should be slightly raised.
- Spread the raspberry preserves over the surface, leaving a ½-inch border around the edges. Gently press the jam into the dough, creating pockets. The jam should be visible in the center of each pocket. This step is pure joy; the jam’s bright color looks like a splash of paint.
- Sprinkle the confectioners’ sugar over the jam. The sugar will melt slightly during baking, forming a sweet glaze. The dusting should be even, covering the entire surface. The sugar adds a subtle crunch to the crust.
- Bake at 425°F for 25 minutes, or until the edges are golden brown. The crust should crackle slightly as it bakes. The jam inside will caramelize, creating a glossy, sweet center. The smell of warm bread and jam will fill the kitchen like a sweet perfume.
- Remove from the oven and let it cool on a wire rack for 10 minutes. This rest time allows the steam to escape, preventing sogginess. The bread should still be warm, with a slight steam rising from the jam pockets. The aroma is irresistible.
- Slice into squares or rectangles, and serve immediately. The bread is best enjoyed warm, but you can also reheat it in a toaster oven for a few minutes. The jam will stay luscious, and the crust will remain crisp.
That's it — you did it. But hold on, I've got a few more tricks that'll take this to another level. And now the fun part. I dare you to taste this and not go back for seconds.
Insider Tricks for Flawless Results
The Temperature Rule Nobody Follows
Most bakers bake at 375°F, but this recipe thrives at a higher 425°F. The higher heat caramelizes the jam and creates a crisp crust that’s hard to resist. The dough’s interior remains airy, while the surface becomes a golden, slightly crunchy shell. If you’re using a convection oven, lower the temperature by 25°F to avoid over‑browning.
Why Your Nose Knows Best
As the bread bakes, you’ll notice a sweet, fruity aroma that’s almost intoxicating. That scent is a sign the jam is caramelizing properly. If the aroma is too weak, the jam hasn’t caramelized fully, and you might need to bake a few minutes longer. Trust your nose; it’s the best judge of doneness.
The 5-Minute Rest That Changes Everything
Letting the bread rest for exactly 5 minutes before slicing allows the steam to settle, preventing sogginess. The rest also lets the jam thicken slightly, creating a perfect glaze. I’ve seen people cut the bread too early, and the jam runs everywhere. This simple step ensures a clean, elegant slice.
Keep the Dough Moist
If your dough feels dry, add a tablespoon of whole milk. The milk adds a subtle richness and helps the dough stay moist during baking. It also improves the crumb’s tenderness. However, don’t add too much, or the dough will become too soft.
Use a Silicone Mat for Even Baking
A silicone baking mat prevents sticking and ensures even heat distribution. It also makes cleanup a breeze, saving you time for more fun. The mat’s non‑stick surface is a game‑changer for this recipe, especially if you’re baking in a non‑stick pan.
Creative Twists and Variations
This recipe is a playground. Here are some of my favorite ways to switch things up:
Chocolate‑Covered Delight
Swap the raspberry preserves for chocolate hazelnut spread. After baking, drizzle melted dark chocolate over the warm bread. The chocolate pairs beautifully with the buttery crust and creates a decadent treat. This variation is perfect for a chocolate lover’s brunch.
Orange Zest Surprise
Add a tablespoon of orange zest to the dough before the first rise. The citrus aroma will mingle with the jam, creating a bright, uplifting flavor. The zest also adds a subtle bitterness that balances the sweetness. This version is ideal for a springtime gathering.
Nutty Crunch
Sprinkle toasted almond slivers over the jam before baking. The nuts add a crunchy texture that contrasts with the soft crumb. The nutty aroma enhances the overall flavor profile. This twist is great for a cozy, nut‑filled dessert.
Spiced Cinnamon Swirl
Stir a teaspoon of ground cinnamon into the dough before shaping. The cinnamon will infuse the bread with a warm, spicy note. The swirl of cinnamon will also create a beautiful pattern on the crust. This variation is a perfect fall treat.
Low‑Carb Alternative
Replace the all‑purpose flour with almond flour and reduce the sugar. Use a sugar substitute for the confectioners’ sugar dusting. The resulting bread will have a nutty flavor and a lower carbohydrate count. This version is ideal for keto or low‑carb enthusiasts.
Storing and Bringing It Back to Life
Fridge Storage
Wrap the bread tightly in plastic wrap and store in the fridge for up to 3 days. The bread will stay moist, and the jam will remain luscious. When you’re ready to eat, simply reheat in a toaster oven at 350°F for 5 minutes. The crust will regain its crispness.
Freezer Friendly
Place the cooled bread in a freezer bag, removing as much air as possible. Freeze for up to 2 months. When you want to enjoy it, thaw at room temperature for 1 hour, then warm in a toaster oven. The bread will taste almost as fresh as when it was first baked.
Best Reheating Method
The best way to reheat is in a preheated oven at 350°F for 5–7 minutes. If the bread feels dry, add a tiny splash of water before reheating — it steams back to perfection. The jam will remain silky, and the crust will stay crisp.