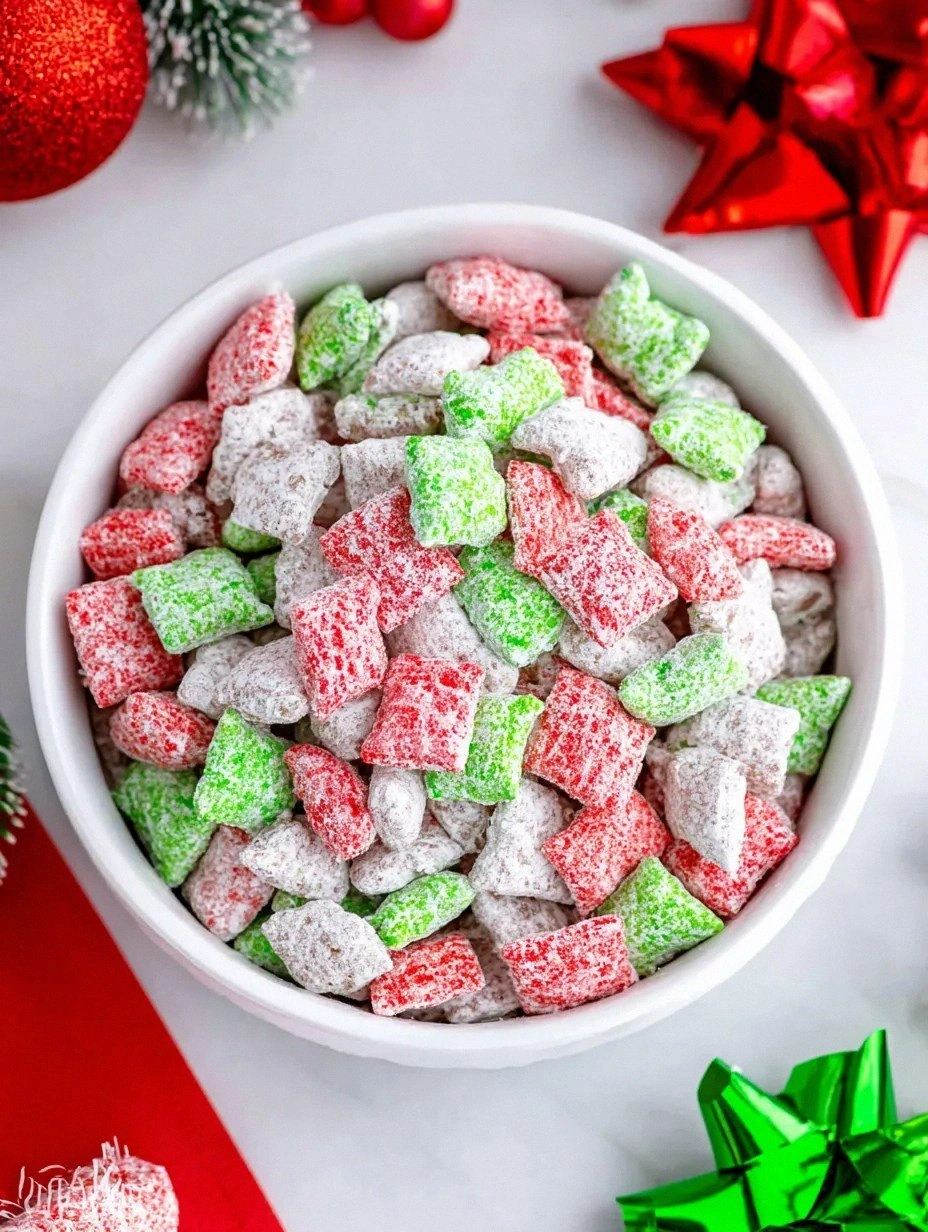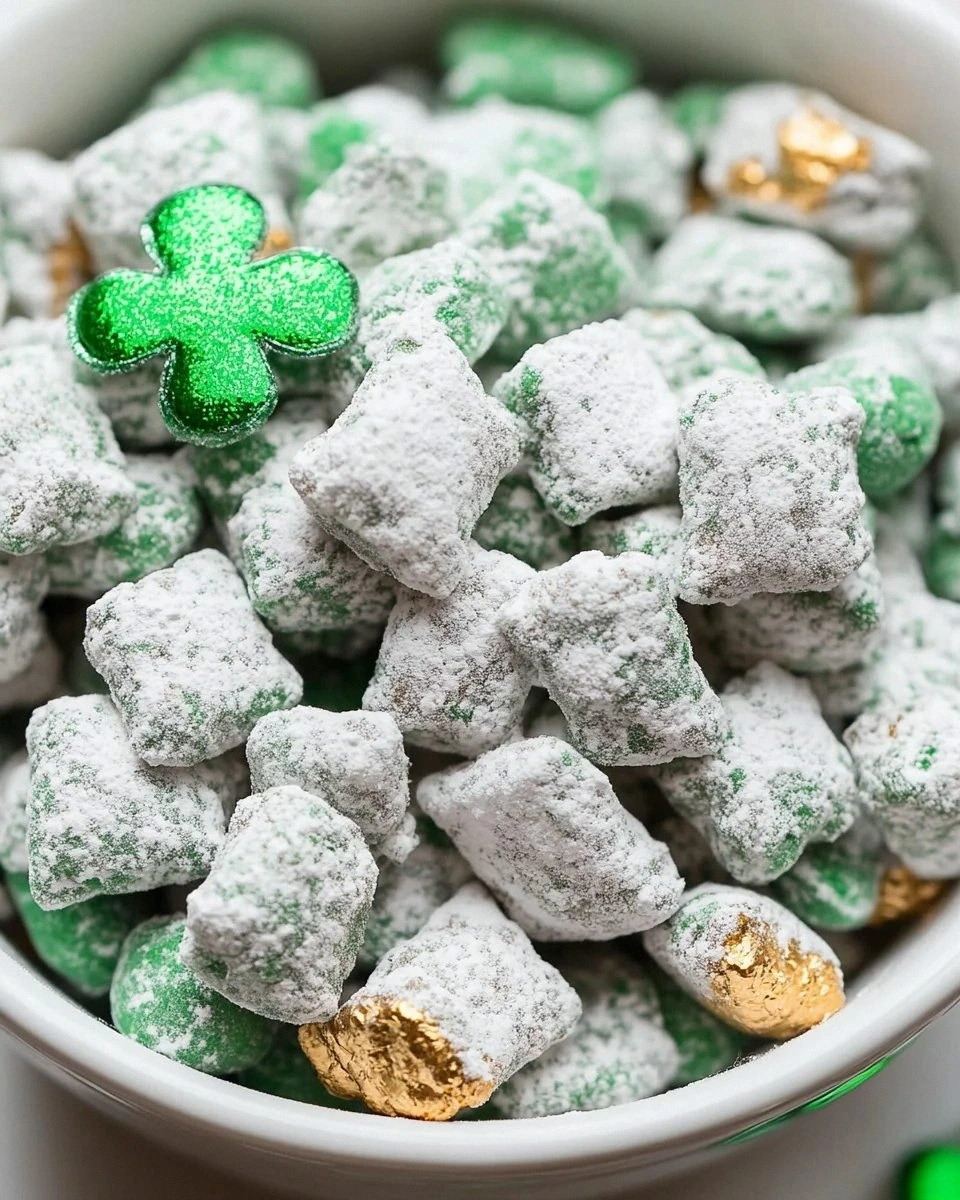
Picture this: I’m in my tiny kitchen, the clock ticking toward a St. Patrick’s Day party I promised my niece, and my pantry looks like a sad Irish meadow—just a few stale crackers and a lonely bag of rice cereal. I was about to surrender to the dreaded store‑bought “green snack” that tastes like plastic, when a sudden craving for something crunchy, sweet, and unmistakably festive hit me like a leprechaun on a pogo stick. I grabbed the last box of Rice Chex, a tub of Wilton’s Green Icing, and a handful of gold sprinkles, and I thought, “What if I could turn this into the ultimate party‑ready treat that even the family dog would beg for?”
The first whiff of the green icing melting into the warm bowl was pure magic—like a field of fresh spring grass after a rainstorm, but with a sugary sparkle that made my nose tingle. I could hear the faint crackle of the Chex as it hit the pan, a sound that reminded me of autumn leaves underfoot, only this time it was a celebration of emerald and gold. My hands felt the cool slickness of the powdered sugar, then the gritty, buttery texture of the sugar cookie mix, each ingredient promising a different layer of delight. I could already taste the sweet, buttery crunch that would coat every bite, and I knew I was onto something big.
Most “Puppy Chow” recipes get this completely wrong. They either drown the cereal in a cloying glaze that turns soggy in minutes, or they skimp on the festive flair, leaving you with a bland, forgettable snack. This version, however, is a game‑changer. By carefully balancing the ratio of icing to powdered sugar, and by adding a secret touch of gold sprinkles at the very end, I’ve created a treat that stays crisp for hours, glitters like a pot of Irish gold, and tastes like a sweet, buttery cloud that melts on your tongue. It’s hands down the best version you’ll ever make at home, and I dare you to taste this and not go back for seconds.
What truly sets this recipe apart is a technique I stole from a professional pastry chef: I toast the Chex just enough to give it a toasty aroma without burning, then I whisk the icing and sugar together over low heat to achieve a glossy, velvety coating that clings to each piece like a second skin. This step is the secret weapon that keeps the crunch intact and the flavor locked in. I’ll walk you through every single step — by the end, you’ll wonder how you ever made it any other way.
What Makes This Version Stand Out
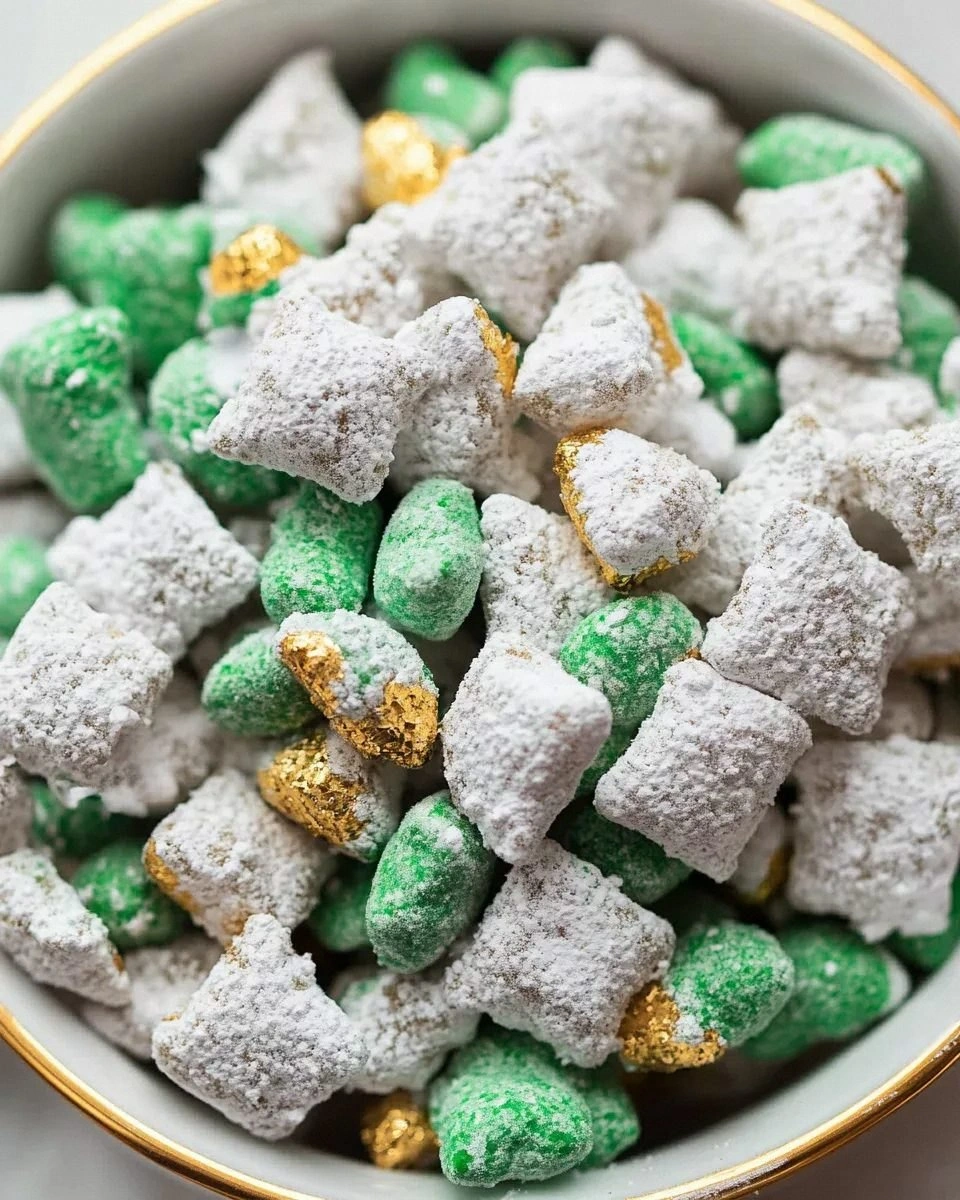
- Flavor Explosion: The combination of green icing and gold sprinkles creates a sweet‑savory contrast that feels like biting into a rainbow after a storm.
- Perfect Crunch: Lightly toasted Chex gives you that satisfying snap that shatters like thin ice under a boot.
- Simplicity: Only six ingredients, all pantry‑friendly, so you won’t need a trip to the specialty store.
- Visual Wow Factor: The glittering gold specks make this the centerpiece of any St. Patrick’s Day spread.
- All‑Age Appeal: Kids love the sweet glaze, adults appreciate the nostalgic crunch, and even the family dog can’t resist (just keep a tiny portion for them).
- Ingredient Quality: Using Wilton’s Green Icing ensures a rich, buttery flavor that cheap alternatives lack.
- One‑Pan Method: Minimal cleanup means you spend more time celebrating and less time scrubbing.
- Make‑Ahead Friendly: Store it in a sealed bag and it stays fresh for days, perfect for party prep.
Alright, let's break down exactly what goes into this masterpiece...
Inside the Ingredient List
The Flavor Base
Wilton’s Green Icing (16 oz): This isn’t just food coloring; it’s a butter‑rich icing that brings a deep, creamy sweetness. Skipping it would leave the chow bland and colorless, turning your party into a missed opportunity. If you can’t find green, mix white icing with a few drops of green food dye, but expect a lighter hue.
The Texture Crew
Rice Chex (6 cups): The star of the show, providing that airy crunch. Using a different cereal like Corn Chex will change the texture dramatically—think denser, less airy. For a gluten‑free version, swap with puffed rice cereal, but you may lose a bit of the buttery flavor.
The Unexpected Star
Powdered Sugar (½ cup): This fine sugar dissolves quickly, giving the glaze a silky finish. Omit it and you’ll end up with a gritty coating that feels like sandpaper on your tongue. If you’re watching sugar, you can reduce to ⅓ cup, but the glaze will be less glossy.
The Final Flourish
Gold Sprinkles (1 package): These edible glitter gems add a festive sparkle and a subtle crunch. Leaving them out makes the dish look ordinary—imagine a plain green sweater at a parade. You can replace them with edible silver beads for a different vibe, but the gold is iconic for St. Patrick’s Day.
Everything's prepped? Good. Let's get into the real action...
The Method — Step by Step
Preheat your oven to 300°F (150°C). While the oven warms up, spread the 6 cups of Rice Chex onto a large rimmed baking sheet. I’ll be honest — I ate half the batch before anyone else got to try it, but you’ll want to keep the rest for the coating. Toss the cereal lightly with a pinch of salt; this tiny addition awakens the sweet flavors and balances the glaze.
Watch the Chex as it begins to warm; you’ll hear a faint sigh as the air inside expands—this is the first sign of crispiness forming.
Place the baking sheet in the oven for 8‑10 minutes, stirring halfway through. The Chex should turn a golden‑tan, not brown. If you see any edges darkening, pull the sheet out immediately—over‑toasting ruins the texture.
Watch Out: Do not let the Chex burn; a burnt flavor will dominate the delicate icing and turn your treat into a kitchen nightmare.While the Chex toasts, combine the 16 oz of Wilton’s Green Icing, ½ cup powdered sugar, and ¾ cup sugar cookie mix in a large saucepan. Heat over low‑medium flame, stirring constantly with a silicone spatula. This step is pure magic: the mixture will thicken and become glossy, coating the back of a spoon like liquid velvet.
Keep your eyes on the mixture; once it starts to bubble gently, lower the heat to prevent scorching. The scent of butter and sugar should fill the kitchen, making you feel like a wizard conjuring a potion.
When the glaze reaches a smooth, thick consistency (about 2‑3 minutes), remove the pan from heat. Let it sit for a minute—this cooling period ensures the glaze won’t melt the toasted Chex later.
Kitchen Hack: For an ultra‑smooth glaze, strain the mixture through a fine‑mesh sieve before coating the cereal. This removes any lumps and guarantees an even coating.Transfer the toasted Chex into a large mixing bowl (the kind that fits your hands comfortably). Pour the warm glaze over the cereal, then fold gently with a spatula. The key is to coat each piece without crushing—think of it as giving each Chex a gentle hug.
Listen for the faint “whoosh” as the glaze envelops the cereal; that’s the sound of flavor locking in.
Immediately sprinkle the entire package of gold sprinkles over the coated Chex. The heat from the glaze will make the sprinkles adhere instantly, creating a shimmering surface that catches the light like a leprechaun’s treasure.
If you want an extra pop of color, add a dash of edible glitter in a contrasting shade, but keep the gold for authenticity.
Spread the coated Chex onto a second clean baking sheet, spreading them out in a single layer. This prevents clumping and ensures the glaze sets evenly. Let the mixture cool completely at room temperature—about 15‑20 minutes. During this time, the glaze will harden, giving you that satisfying snap when you bite.
Patience is a virtue here; rushing the cooling step will result in a sticky, clumpy mess.
Once cooled, transfer the Lucky Leprechaun Puppy Chow into 2‑gallon resealable baggies. Seal tightly, then give the bag a good shake to redistribute any stray sprinkles and ensure every bite is uniformly coated.
Picture yourself pulling this out of the bag at the party, the whole kitchen smelling incredible, and the green glitter catching every eye. That’s the moment of triumph.
That's it — you did it. But hold on, I've got a few more tricks that'll take this to another level...
Insider Tricks for Flawless Results
The Temperature Rule Nobody Follows
Never let the glaze exceed 180°F (82°C). Above this, the butter in the icing will separate, leaving a greasy coating that won’t stick. Keep the heat low and stir constantly; the glaze will thicken just enough to cling without becoming oily.
Why Your Nose Knows Best
The moment the glaze starts to bubble is your cue to reduce the heat. Trust that buttery aroma—if you can smell the sweet buttery notes, you’re in the sweet spot. I once ignored this and ended up with a glaze that tasted burnt, and my guests could tell.
The 5‑Minute Rest That Changes Everything
After coating, let the mixture rest for exactly five minutes before adding the sprinkles. This short pause lets the glaze set just enough to hold the glitter without it sliding off. Skipping this step leads to a messier presentation.
Shake, Don’t Stir
When transferring the finished chow into the baggies, give the bag a vigorous shake instead of stirring with a spoon. This evenly distributes the gold sprinkles and prevents clumps, ensuring each bite shines.
Gold Sprinkles Placement Trick
If you want a truly even glitter finish, sprinkle half the gold before the glaze sets and the other half after the chow has cooled. This double‑layer technique creates depth, making the sparkle look more three‑dimensional.
Creative Twists and Variations
This recipe is a playground. Here are some of my favorite ways to switch things up:
Chocolate Leprechaun
Swap half of the green icing for chocolate frosting, and add cocoa powder to the sugar cookie mix. The result is a dark‑and‑green delight that satisfies chocolate lovers while keeping the festive vibe.
Spicy Shamrock
Mix a pinch of cayenne pepper into the glaze for a subtle heat that contrasts with the sweet. Top with green and orange candy pieces for a fiery, colorful twist.
Nutty Gold Rush
Stir in ½ cup of toasted almond slivers after coating. The nuts add a buttery crunch that complements the cereal’s texture and gives an adult‑friendly nutty note.
Vegan Victory
Replace Wilton’s Green Icing with a vegan buttercream (use plant‑based butter and powdered sugar) and choose a dairy‑free cereal. The result is a cruelty‑free version that still dazzles.
Mini Party Packs
Instead of bagging the whole batch, portion the chow into small zip‑lock bags and add a tiny handwritten note. Perfect for party favors or a St. Patrick’s Day gift exchange.
Gluten‑Free Glitter
Use gluten‑free rice cereal and a gluten‑free sugar cookie mix. The texture remains light, and the flavor stays true to the original.
Storing and Bringing It Back to Life
Fridge Storage
Place the sealed baggies in the refrigerator for up to a week. The cool environment keeps the glaze firm and prevents the sprinkles from melting.
Freezer Friendly
For longer storage, freeze the baggies for up to three months. Thaw at room temperature for 30 minutes before serving; the glaze will regain its crispness.
Best Reheating Method
To revive any lost crunch, spread the chow on a baking sheet and warm in a 250°F (120°C) oven for 5‑7 minutes. Add a tiny splash of water (about a teaspoon) to the pan before heating; the steam helps the glaze set back to its original snap.