I still remember that night when the kitchen felt like a battlefield—short ribs burning on the grill, the smell of charred meat mingling with the scent of my neighbor’s salsa, and a frantic scramble to salvage a dinner that would never taste the same again. I stared at the seared edges, my heart racing, and thought, “If only there was a way to turn this disaster into a masterpiece.” That moment sparked the creation of Short Rib Marbella, a dish that marries the deep, smoky flavor of slow‑braised beef with the briny punch of olives and capers, all crowned with a glossy red‑wine reduction. I dared myself to experiment until I found the perfect balance of salt, acidity, and herbaceous warmth. Now, I’m ready to share every detail, so by the end of this post you’ll wonder how you ever cooked short ribs without this version.
Imagine the first bite: the meat so tender it practically melts in your mouth, the sauce coating it like a velvety blanket, and the subtle crunch of fresh herbs cutting through the richness. The aroma rises, a heady mix of caramelized onions, garlic, and the unmistakable scent of simmered wine. The sound of the pot gently bubbling is a comforting lullaby, and the texture—soft meat juxtaposed with the slight snap of olives—creates a symphony in your mouth. I dare you to taste this and not go back for seconds; the moment you realize how everything comes together, you’ll feel a rush of culinary triumph.
What sets this recipe apart is not just the ingredients, but the technique that unlocks each one’s full potential. I’ve stripped away unnecessary steps, kept the flavor profile honest, and added a few secret touches that elevate the dish from good to unforgettable. The result is a hearty, comforting entrée that feels like a warm hug, yet has the sophistication of a restaurant‑style plate. Picture yourself pulling this out of the oven, the whole kitchen smelling incredible, and guests lining up for the first bite. This is hands down the best version you'll ever make at home, and I’m here to guide you through every single step.
Let me walk you through every single step—by the end, you’ll wonder how you ever made it any other way. The journey starts with a simple sear, followed by a slow, low‑heat braise that draws out the meat’s natural juices. A splash of red wine adds depth, while olives and capers bring that unmistakable Mediterranean zing. The sauce reduces into a glossy, savory coating that clings to the ribs, and a final burst of fresh herbs gives it a bright, lively finish. Ready to dive into the details? Let’s get started.
What Makes This Version Stand Out
- Flavor Depth: The combination of red wine, olives, and capers creates a complex, layered taste that goes beyond simple braising.
- Texture Contrast: The meat is fall‑apart tender, while the olives provide a satisfying bite that breaks up the richness.
- Time Efficiency: A quick sear followed by a low‑heat simmer means you’re done in under an hour, yet the result feels like a gourmet dinner.
- Ingredient Quality: Using high‑quality short ribs and fresh herbs ensures the dish shines with each bite.
- Make‑Ahead Friendly: The sauce can be prepared in advance and reheated without losing flavor.
- Crowd‑Pleaser: The bold Mediterranean flavors make it a hit at family gatherings or dinner parties.
Alright, let's break down exactly what goes into this masterpiece...
Inside the Ingredient List
The Flavor Base
The foundation of any great braise starts with aromatics. Diced onion, minced garlic, sliced carrots, and celery create a savory bed that infuses the meat with subtle sweetness and earthiness. Each vegetable contributes a different layer: onions bring caramelized depth, garlic offers pungency, carrots add natural sugar, and celery provides a bright, slightly bitter counterpoint. Skipping any of these means losing a piece of the complex flavor puzzle. If you’re short on time, you can use a pre‑made mirepoix mix, but the fresh versions give the sauce a brighter, fresher finish.
The Texture Crew
Short ribs are the star of this dish, but their texture is what truly makes the meal memorable. Sourcing ribs with a good marbling ratio—about 20% fat—ensures they stay moist during the long braise. A generous layer of olive oil is crucial for a beautiful sear that locks in juices and adds a subtle Mediterranean flavor. If you prefer a leaner cut, consider trimming excess fat, but be aware that the meat will be less juicy. A small amount of tomato paste helps thicken the sauce and adds a gentle tang that balances the richness of the beef.
The Unexpected Star
Capers are often overlooked, but they bring a sharp, lemony bite that cuts through the richness of the meat. Rinsing them thoroughly removes excess salt and ensures a balanced flavor. If you can’t find capers, a small splash of white wine vinegar can mimic their acidity, but the texture and unique taste will be different. The olives—preferably Kalamata for their deep flavor—add a salty, slightly fruity note that pairs beautifully with the wine reduction.
The Final Flourish
Fresh herbs are the secret to elevating the dish from comforting to sophisticated. A sprig of rosemary and thyme during the braise infuses the sauce with aromatic oils, while chopped parsley and a squeeze of lemon juice at the end add brightness and color. These final touches bring the dish together, making it feel fresh and alive. If you’re vegetarian, simply omit the meat and replace it with hearty root vegetables; the sauce will still shine.
Everything's prepped? Good. Let's get into the real action...
The Method — Step by Step
- Preheat the oven to 300°F (150°C). Pat the short ribs dry with paper towels; this step is critical because moisture on the surface will prevent a good sear. Season both sides generously with salt and freshly ground black pepper. The first sear will lock in flavor and create a caramelized crust that becomes the base of our sauce.
- Sear the ribs. Heat 2 tablespoons of olive oil in a large Dutch oven over medium‑high heat until shimmering. Place the ribs in the pan, working in batches to avoid overcrowding. Sear for 3–4 minutes on each side until a deep brown crust forms. Flip carefully and set aside. The sizzling sound is the promise of flavor to come.
- Build the aromatic base. In the same pot, add diced onion, minced garlic, sliced carrots, and celery. Cook, stirring occasionally, until the vegetables soften and the onion turns translucent—about 5 minutes. The mixture should emit a sweet, savory aroma that signals the sauce’s foundation is taking shape.
- Introduce the tomato paste. Stir in one tablespoon of tomato paste, letting it caramelize for 1 minute. This step deepens the color and adds a subtle acidity that balances the beef’s richness. If the paste sticks, add a splash of red wine to deglaze the pan.
- Deglaze with wine. Pour in one cup of dry red wine, scraping up any browned bits from the bottom of the pot. The wine should reduce by half, concentrating its flavors and forming a fragrant base for the braise.
- Add liquid and aromatics. Return the seared ribs to the pot, then pour in two cups of beef broth. Toss in two bay leaves, a sprig of rosemary, and a sprig of thyme. The liquid should come about halfway up the ribs; if it’s too high, reduce the broth slightly. Bring the mixture to a gentle simmer.
- Braise slowly. Cover the pot and transfer to the preheated oven. Cook for 2 hours, checking occasionally to ensure the liquid hasn’t evaporated. The slow heat allows the collagen in the short ribs to break down into gelatin, giving the meat a silky, melt‑in‑your‑mouth texture.
- Incorporate olives and capers. About 30 minutes before the end of cooking, stir in half a cup of sliced Kalamata olives and two tablespoons of capers. These briny components will infuse the sauce with bright, salty notes that contrast the meat’s richness.
- Finish the sauce. Remove the pot from the oven and let the ribs rest for 10 minutes. Then, transfer the ribs to a serving platter and strain the braising liquid through a fine sieve, pressing the solids to extract every drop of flavor. Return the liquid to the pot, bring to a simmer, and reduce until it coats the back of a spoon. Stir in a squeeze of lemon juice and chopped parsley for brightness.
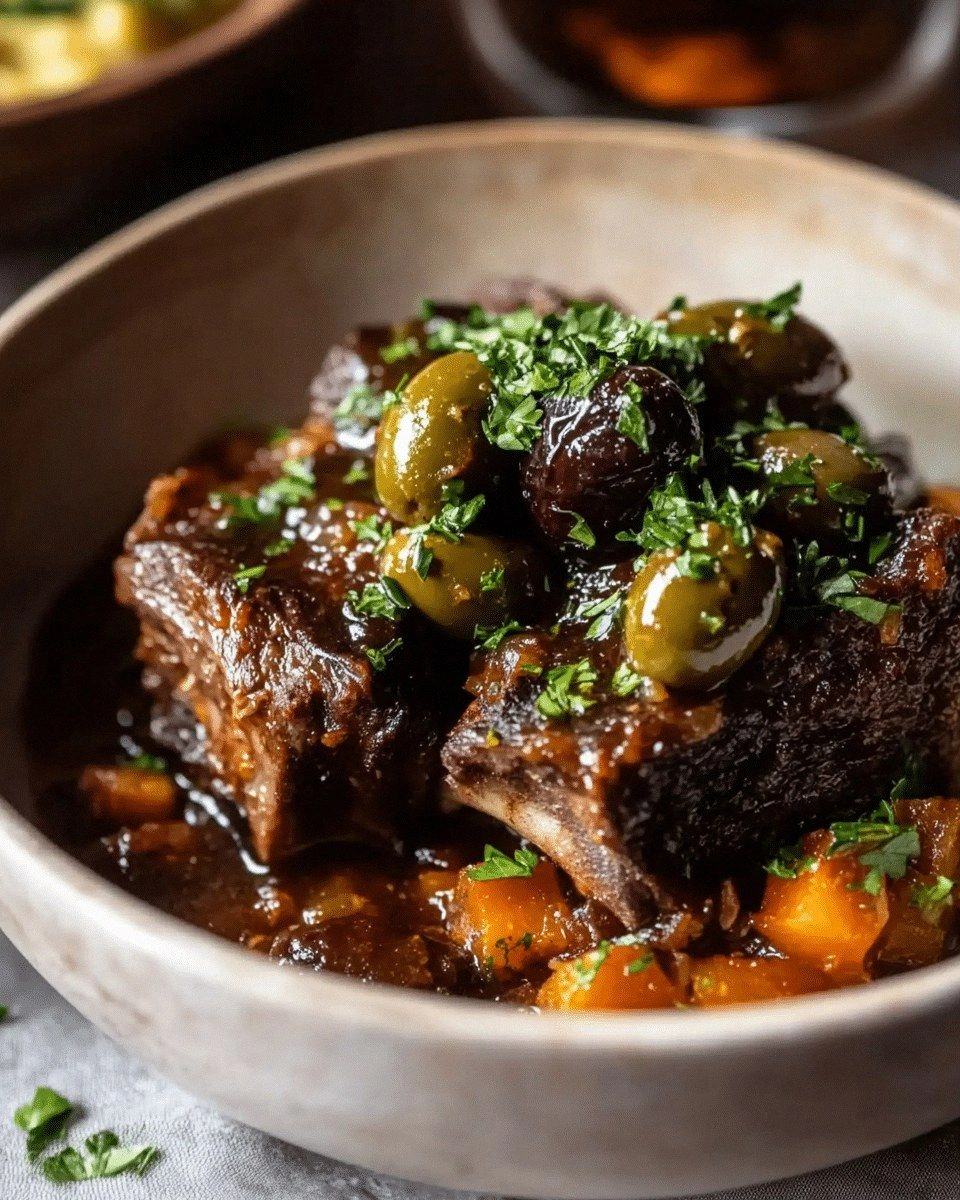
- Serve. Plate the short ribs, spoon the glossy sauce over them, and garnish with additional parsley. The result is a dish that looks as impressive as it tastes, with a sauce that clings to the meat like velvet.
That’s it — you did it. But hold on, I've got a few more tricks that'll take this to another level...
Insider Tricks for Flawless Results
The Temperature Rule Nobody Follows
Many cooks believe a high heat is essential for braising, but the secret lies in low, steady heat. A temperature of 300°F (150°C) allows the collagen to break down without toughening the meat. If you accidentally set the oven too high, the exterior will char while the interior remains undercooked. I once tried 400°F and the ribs were tough; the lesson? Keep it low and patient.
Why Your Nose Knows Best
During the braise, trust your sense of smell. The aroma of simmering wine and caramelized aromatics is the cue that the sauce is developing the right depth. If the smell becomes overly sour or metallic, it means the wine has reduced too much or the broth is too salty. Adjust by adding a splash of water or a pinch of sugar to balance.
The 5-Minute Rest That Changes Everything
After removing the ribs from the oven, let them rest for five minutes before carving. This brief pause allows the juices to redistribute, ensuring every bite stays moist. Skipping this step often results in dry, uneven meat. I once cut into a rib immediately; the juices spilled onto the plate, leaving the meat dry.
The Herb Timing Trick
Add fresh herbs at the very end of cooking rather than at the beginning. Fresh rosemary and thyme lose their aromatic oils when exposed to prolonged heat, resulting in a muted flavor. By adding them in the last 10 minutes, you preserve their bright, citrusy notes that cut through the richness.
The Quick Deglaze Hack
If you notice stuck bits after searing, deglaze the pan with a splash of wine before adding the aromatics. This not only lifts the flavorful browned bits but also prevents them from burning and turning bitter. A quick splash of wine or broth can save a dish from a potential flavor disaster.
The Rest and Reheat Routine
When reheating leftovers, add a small splash of beef broth or water to the sauce. This restores moisture and prevents the sauce from becoming too thick. Reheat gently on low heat, stirring constantly to keep the sauce from separating. The result is a dish that tastes as fresh as when it was first prepared.
Creative Twists and Variations
This recipe is a playground. Here are some of my favorite ways to switch things up:
Spicy Saffron Twist
Add a pinch of saffron threads to the braising liquid and a dash of crushed red pepper. The saffron imparts a subtle floral note while the heat keeps the dish lively. Pair with a side of saffron risotto for a cohesive flavor profile.
Citrus Burst Variation
Replace the lemon juice with orange zest and a splash of fresh orange juice. The citrusy brightness cuts through the richness, creating a bright, Mediterranean vibe. Serve over a bed of couscous to absorb the juices.
Herb‑Infused Pesto Finish
Stir in a spoonful of basil pesto at the end of cooking. The pesto adds a creamy texture and a burst of fresh herb flavor that complements the olives. This version works well with a side of roasted potatoes.
Smoky Chipotle Variation
Add a teaspoon of chipotle in adobo to the braise for a smoky, slightly sweet heat. The chipotle pairs beautifully with the wine reduction, creating a complex flavor profile that’s perfect for a winter dinner.
Vegetarian Swap
Replace the short ribs with hearty root vegetables like carrots, parsnips, and sweet potatoes. Use vegetable broth and a splash of balsamic vinegar to mimic the depth of the original sauce. The result is a comforting, plant‑based entrée.
Breakfast‑Style Short Rib Skillet
Serve the braised short ribs over a bed of fluffy scrambled eggs and toast. The richness of the meat pairs with the lightness of the eggs, creating a breakfast that feels both indulgent and satisfying.
Storing and Bringing It Back to Life
Fridge Storage
Cool the dish to room temperature before covering it tightly with plastic wrap or an airtight container. Store in the refrigerator for up to 3 days. The sauce will thicken slightly as it cools, but it remains flavorful.
Freezer Friendly
For longer storage, portion the meat and sauce separately into freezer‑safe containers. The meat can be frozen for up to 3 months, while the sauce should be kept for up to 2 months. Label each container with the date for easy tracking.
Best Reheating Method
Reheat the meat and sauce over low heat, adding a splash of water or broth to keep the sauce moist. Stir frequently to prevent scorching. A quick microwave reheat can also work if you’re in a hurry, but be sure to stir after each 30‑second interval.