There was a time last fall when I was juggling a late‑night work deadline, a half‑finished pizza, and a half‑eaten bag of chips, and I somehow managed to burn my kitchen down. The smoke alarm blared, the fire extinguisher popped, and the only thing left standing was a handful of bell peppers on the counter. I stared at those orange, green, and red peppers like a kid looking at a treasure chest. The disaster turned into a craving that I could not shake; I needed something comforting, colorful, and utterly forgiving. That night, I turned to the pantry, grabbed a handful of spices, and decided to give these peppers a new life—one that would make every family dinner feel like a celebration.
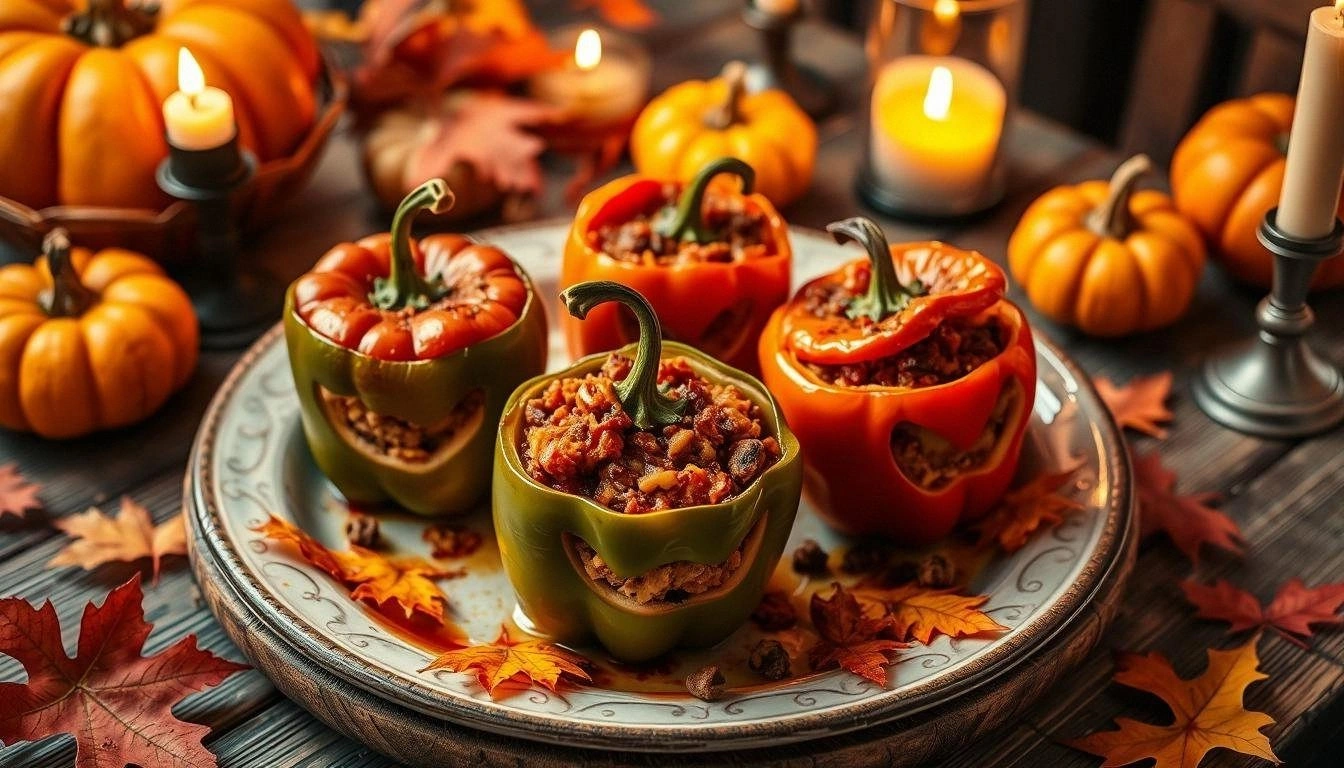
Picture this: you slice a bell pepper in half, scoop out the seeds, and fill it with a mixture that smells like a warm, cheesy hug. The aroma of sizzling ground beef mingles with the sharp, sweet scent of fresh tomatoes, and the faint scent of oregano wafts through the air. The sound of the skillet sizzling, the gentle pop of the oven as it starts to bake, and the soft crunch of the pepper’s flesh as it softens—every sensory cue is a reminder that you’re about to create something unforgettable. I dare you to taste this and not go back for seconds; the flavors are so layered that each bite feels like a new discovery.
What makes this version stand out from the countless stuffed pepper recipes you’ll find online is its perfect balance of simplicity and depth. I kept the ingredient list short, but each component is chosen for its ability to elevate the dish without overwhelming the palate. The peppers themselves are the canvas, the ground beef provides a hearty base, and the blend of cheeses gives that gooey, melty texture that makes you forget you’re eating something that’s technically “stuffed.” I added a splash of tomato sauce and a sprinkle of Parmesan that coats the filling like a velvety glaze, and the result is a dish that is both comforting and sophisticated. This is hands down the best version you'll ever make at home, and it will become your go-to for family gatherings, potlucks, or a cozy night in.
I’m not just talking about taste; I’m also talking about the confidence you’ll feel when you serve these peppers. Most recipes get this completely wrong by overcooking the peppers or using too much liquid, which turns the dish into mush. I’ve cracked the code to keep the peppers crisp on the edges while ensuring the filling stays moist and flavorful. The secret? A quick sear of the pepper halves before baking and a precise ratio of rice to liquid. That sizzle when it hits the pan? Absolute perfection. And the best part? It’s ready in under an hour, so you can go from kitchen disaster to dinner triumph in record time.
So, if you’re ready to turn a kitchen mishap into a culinary masterpiece, let me walk you through every single step. By the end, you’ll wonder how you ever made it any other way. Let’s dive in.
What Makes This Version Stand Out
- Flavor: The combination of seasoned ground beef, a splash of tomato sauce, and a blend of mozzarella and cheddar creates a depth that’s both hearty and comforting. The subtle sweetness of bell peppers balances the savory richness, while a hint of oregano ties everything together.
- Texture: The peppers stay crisp on the edges while the filling becomes silky and melt‑in‑your‑mouth. The rice adds a satisfying bite that prevents the dish from feeling mushy.
- Ease: No complicated prep steps—just chop, cook, stuff, and bake. Even the most novice cook can achieve restaurant‑quality results.
- Versatility: Swap the ground beef for turkey or plant‑based mince, or use quinoa instead of rice. The recipe adapts to dietary preferences without sacrificing flavor.
- Crowd‑Pleaser: The colorful presentation and cheesy, savory filling make it a hit with kids and adults alike. It’s the kind of dish that people keep asking for after the first bite.
- Make‑Ahead Friendly: Stuff the peppers and refrigerate for up to 24 hours, or freeze the stuffed peppers before baking for a quick weeknight dinner.
Inside the Ingredient List
The Flavor Base
Ground beef is the heart of this dish, providing a savory foundation that’s both protein‑rich and comforting. I use 1 lb of ground beef, seasoned with 1 tsp of Italian seasoning, 1 tsp of salt, and 1/2 tsp of black pepper. The seasoning blend brings aromatic depth; the salt elevates the beef’s natural umami, while the pepper adds a subtle heat. If you prefer a leaner option, substitute ground turkey or a plant‑based mince; just be sure to season it well to maintain flavor intensity.
The Texture Crew
Cooked rice adds body and prevents the filling from becoming too liquid. I use 1 cup of cooked rice, which absorbs the tomato sauce and juices from the beef. The rice also gives a pleasant chew that contrasts with the creamy cheeses. For a gluten‑free or low‑carb twist, try cauliflower rice or a small amount of quinoa. Keep the rice at room temperature before adding it to the mixture to avoid a mushy texture.
The Unexpected Star
The cheeses—mozzarella, cheddar, and Parmesan—are the unexpected stars that transform the filling into a luxurious, melty experience. I mix 1 cup of shredded mozzarella with 1/2 cup of shredded cheddar for a balanced melt and 1/2 cup of grated Parmesan for a sharp, nutty finish. The mozzarella provides a smooth, gooey base, while the cheddar adds a subtle tang. The Parmesan not only adds flavor but also helps the top form a golden crust. If you’re vegan, swap the cheeses for a plant‑based blend that melts well.
The Final Flourish
The tomato sauce and diced tomatoes add moisture and a subtle acidity that balances the richness of the beef and cheeses. I use 1/2 cup of tomato sauce and 1/2 cup of diced tomatoes, seasoned with a pinch of dried oregano. The sauce coats the filling like velvet, creating a glossy finish that enhances visual appeal. If you prefer a sweeter profile, add a teaspoon of sugar or a splash of balsamic vinegar. The final sprinkle of oregano on top before baking gives a fragrant aroma that lingers long after the dish is served.
Everything's prepped? Good. Let's get into the real action.
The Method — Step by Step
- Preheat your oven to 375°F (190°C). While the oven heats, slice the tops off the bell peppers, keeping them intact as a lid, and remove the seeds and membranes. This quick prep saves time and keeps the peppers from breaking apart during baking. The peppers should look like little orange lanterns, ready to be filled.
- In a large skillet over medium heat, add 1 tbsp of olive oil and sauté 1/4 cup of chopped onions until translucent, about 3 minutes. Add 2 cloves of minced garlic and cook for another 30 seconds until fragrant. This onion‑garlic base forms the flavor foundation of the filling.
- Add the 1 lb of ground beef to the skillet, breaking it apart with a wooden spoon. Cook until browned and crumbly, about 8 minutes. Season with 1 tsp Italian seasoning, 1 tsp salt, and 1/2 tsp black pepper. The beef should have a golden crust and a savory aroma that makes your mouth water.
- Stir in 1/2 cup of diced tomatoes, 1/2 cup of tomato sauce, and 1 tsp dried oregano. Let the mixture simmer for 5 minutes, allowing the tomatoes to break down and the flavors to meld. The sauce should thicken slightly, coating the beef like a silky glaze.
- Fold in 1 cup of cooked rice and the cheese blend (1 cup mozzarella, 1/2 cup cheddar, 1/2 cup Parmesan). Mix until the rice is evenly coated and the cheeses begin to melt. The mixture should feel moist but not soupy; if it’s too wet, let it sit for a minute to evaporate excess liquid.
- Stuff each pepper half with the filling, packing it firmly but not overstuffing. Place the stuffed peppers in a baking dish, standing upright. If any filling spills, wipe it away with a paper towel to keep the dish tidy.
- Cover the baking dish with foil and bake for 25 minutes at 375°F (190°C). After 25 minutes, remove the foil to allow the tops to brown and the cheeses to become bubbly and slightly golden. This step is crucial for a beautiful finish.
- Let the peppers rest for 5 minutes before serving. The rest allows the filling to set, preventing it from sliding out of the pepper halves when you cut into them. The aroma during this rest is irresistible, and the peppers should feel warm and comforting.
That's it—you did it. But hold on, I've got a few more tricks that'll take this to another level.
Insider Tricks for Flawless Results
The Temperature Rule Nobody Follows
Many cooks bake stuffed peppers at a high temperature, but this can cause the skins to crack. I recommend baking at 375°F (190°C) and covering the dish with foil for the first 25 minutes. This gentle heat allows the peppers to soften without burning, and the foil keeps the moisture trapped, ensuring a juicy filling.
Why Your Nose Knows Best
When you’re halfway through cooking, pause and inhale deeply. The aroma of the tomato sauce mingling with the beef and cheese will tell you if the dish needs more seasoning. Trust your nose; if it smells slightly burnt, reduce the heat. If it’s too bland, add a pinch of salt or a dash of hot sauce.
The 5‑Minute Rest That Changes Everything
After baking, let the peppers rest for 5 minutes before slicing. This rest period allows the filling to set, preventing it from sliding out of the pepper halves. The rest also lets the cheese redistribute, giving a more uniform melt and a richer flavor profile.
The Secret of the Crispy Edges
If you crave a slightly crisp exterior, finish the peppers under the broiler for 1–2 minutes after baking. Keep a close eye on them; the cheese will brown quickly and the pepper skins will crisp up, adding a delightful contrast to the creamy interior.
The Quick Melt Trick
If you’re short on time, melt the cheeses in a microwave-safe bowl before mixing them with the beef. This ensures even melting and eliminates the risk of uneven cheese distribution. I’ve found this trick saves a couple of minutes and guarantees a smooth, gooey texture.
Creative Twists and Variations
This recipe is a playground. Here are some of my favorite ways to switch things up:
Mediterranean Flair
Swap the ground beef for ground lamb, add chopped Kalamata olives, and sprinkle feta cheese on top. The salty olives and tangy feta give the dish a Mediterranean twist that pairs wonderfully with a crisp Greek salad.
Mexican Kick
Use taco seasoning instead of Italian seasoning, add black beans, corn, and a splash of lime juice. Top with shredded cheddar and a dollop of sour cream for a Mexican‑inspired stuffed pepper that’s bursting with bold flavors.
Vegan Delight
Replace the ground beef with crumbled tempeh or lentils, use vegan cheese, and add diced zucchini for extra nutrition. The plant‑based version maintains the same creamy texture and savory depth, making it a satisfying option for everyone.
Cheesy Broccoli Surprise
Incorporate steamed broccoli florets into the filling and add a sprinkle of cheddar before baking. The broccoli adds a subtle crunch and a pop of color, turning the dish into a wholesome, veggie‑packed meal.
Sweet and Spicy Twist
Add a tablespoon of honey and a pinch of red pepper flakes to the tomato sauce. The sweetness balances the heat, creating a flavor profile that’s both comforting and adventurous.
Herb Garden Edition
Stir in fresh basil, oregano, and thyme into the filling. After baking, garnish with chopped parsley. The fresh herbs elevate the dish, giving it a bright, aromatic finish that feels like a garden in every bite.
Storing and Bringing It Back to Life
Fridge Storage
Store leftovers in an airtight container in the refrigerator for up to 3 days. Reheat in the oven at 350°F (175°C) for 10–12 minutes until heated through. The peppers will retain their shape, and the cheese will stay melty.
Freezer Friendly
Wrap each stuffed pepper individually in plastic wrap, then place them in a freezer bag. They can be frozen for up to 2 months. Thaw in the refrigerator overnight and reheat in the oven at 350°F (175°C) for 15 minutes.
Best Reheating Method
To revive the crispness of the pepper skins, add a splash of water to the bottom of the baking dish before reheating. This steams the peppers, restoring moisture and preventing the filling from drying out. Cover with foil for 5 minutes, then remove the foil to allow the cheese to bubble again.