I still remember the day I burned a batch of cookies so hard that the smoke alarm sang its own version of “Scent of Lemon.” The kitchen smelled like citrus and disappointment, the sound of butter sizzling, the sight of dough turning from pale to golden, and the feel of dough between fingers that suddenly felt like a burnt brick. I was about to throw the entire batch out the window when I realized that the secret to rescuing them lay in the tiniest detail: the right balance of cornstarch and a splash of lemon zest that could turn a disaster into a triumph. Most people think lemon sugar cookies are just a simple recipe, but this version is a symphony of flavor, texture, and aroma that will make your taste buds do a double take. I dare you to taste this and not go back for seconds.
Picture yourself pulling this out of the oven, the whole kitchen smelling incredible, and the first bite melting on your tongue like a citrus‑kissed cloud. The buttery base is so soft it almost dissolves, while the lemon zest provides a bright, zesty punch that cuts through the sweetness. The addition of cornstarch creates a tender crumb that feels like a cloud kissed by sunshine, and the coarse sparkling sugar gives a satisfying crunch that shatters like tiny fireworks. If you've ever struggled with lemon cookies that are either too dry or too sweet, you're not alone—and I've got the fix. This is hands down the best version you'll ever make at home, and I’ll walk you through every single step so you’ll wonder how you ever made it any other way.
What makes this recipe stand out isn’t just the ingredients; it’s the technique, the timing, and the little tricks that elevate it from ordinary to unforgettable. I’ll share the micro‑challenge of balancing the lemon flavor, the bold claim that these cookies stay soft for days, and a confession: I ate half the batch before anyone else got to try it. You’ll learn how to keep the dough from spreading too thin, how to layer the sugar for that perfect crunch, and why the secret of the sparkling sugar is the difference between “good” and “great.” By the end, you’ll have a recipe that’s so reliable, you’ll never look back.
Okay, ready for the game‑changer? Let me walk you through every single step—by the end, you’ll wonder how you ever made it any other way. The next part? Pure magic. And now the fun part: the method that turns simple ingredients into a buttery, citrus‑laden masterpiece.
What Makes This Version Stand Out
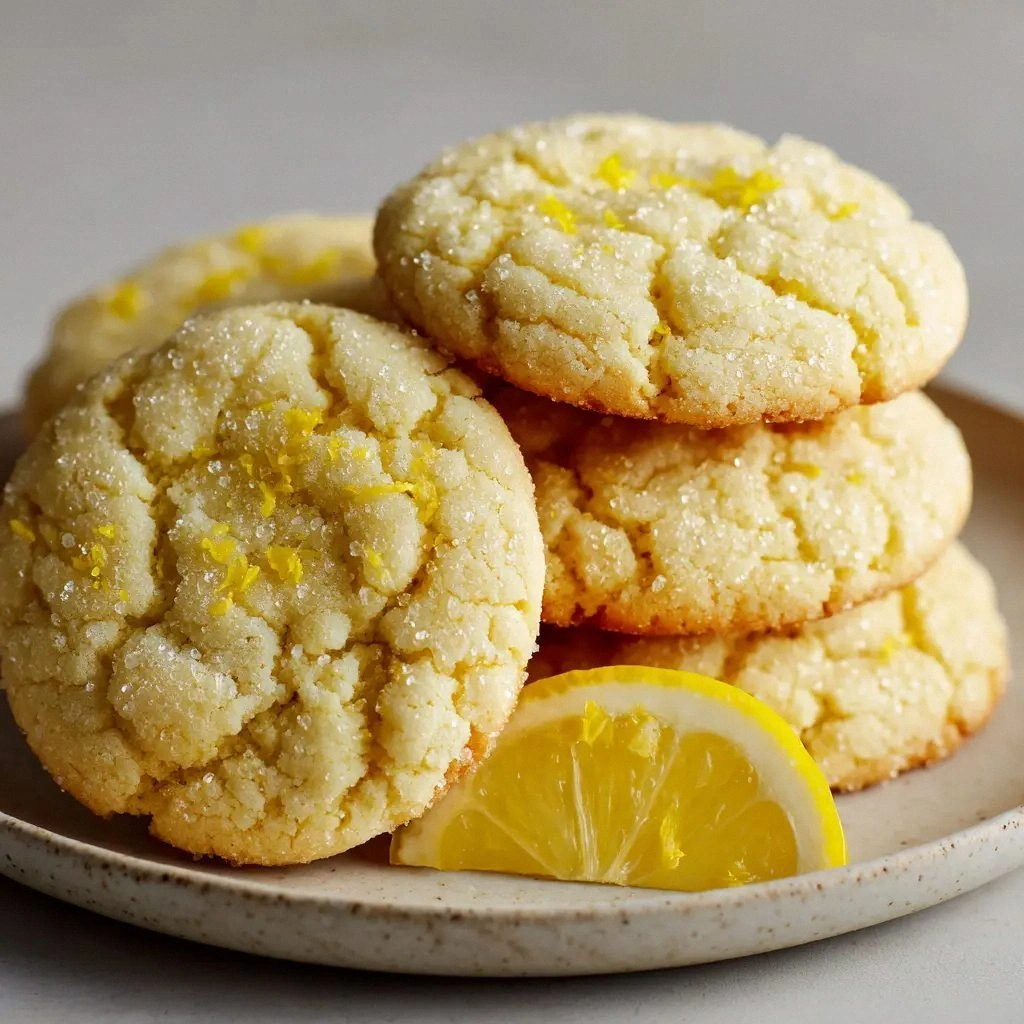
- Flavor: The fresh lemon zest and juice give a bright, authentic citrus punch that feels like a burst of sunshine on your palate.
- Texture: Cornstarch and a splash of baking soda create a cloud‑soft crumb that stays tender even after a week.
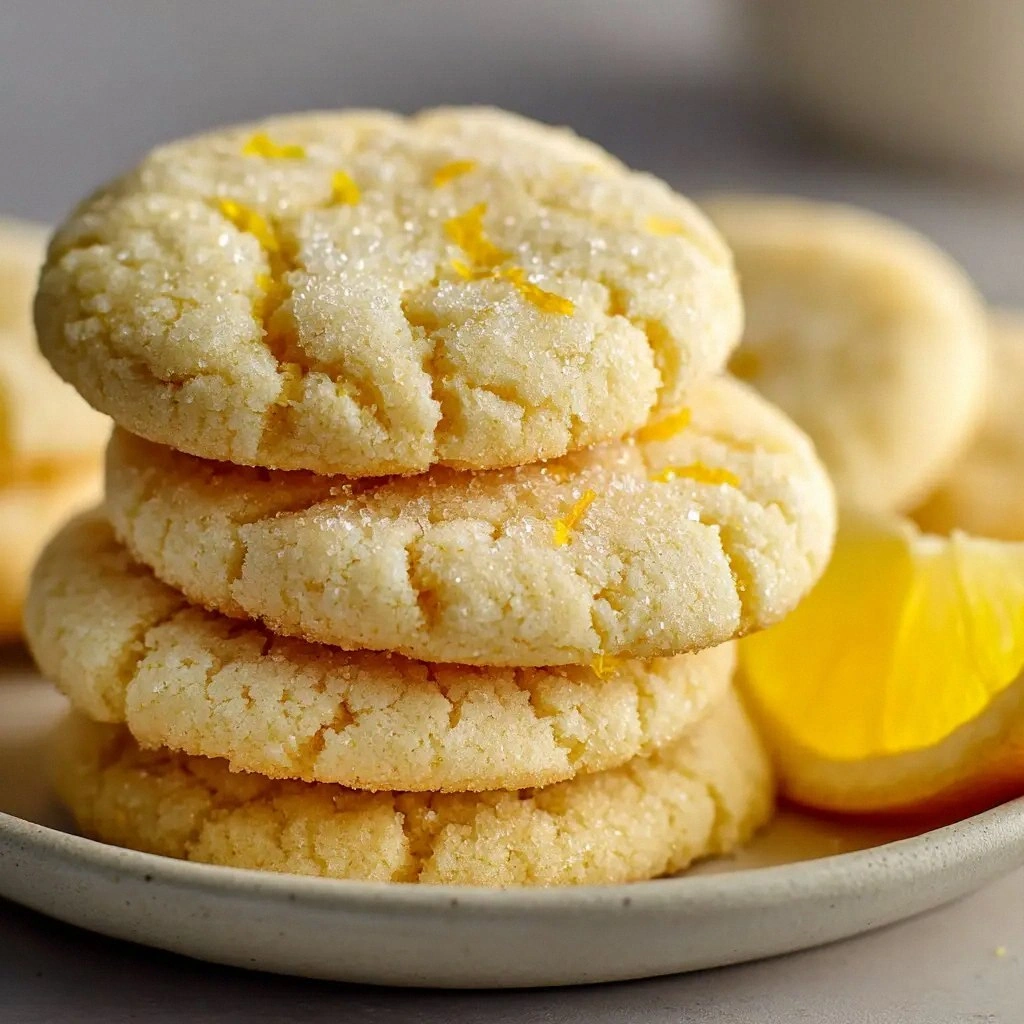
- Crunch: Coarse sparkling sugar adds a delightful crunch that shatters like tiny fireworks when you bite.
- Visual Appeal: The cookies finish with a golden‑brown edge and a subtle sheen from the sugar crystals.
- Versatility: This base can be adapted into iced, dipped, or flavored variations without sacrificing the core experience.
- Make‑Ahead: The dough can be frozen or refrigerated, and the cookies bake to perfection straight from the fridge.
- Ingredient Quality: Using unsalted butter, fresh lemons, and high‑grade sugar ensures each bite is pure.
- Time Efficiency: Prep takes only 15 minutes, and the cookies bake in 30, making it a quick dessert for busy evenings.
Inside the Ingredient List
The Flavor Base
Unsalted butter is the backbone of these cookies, providing richness and a buttery finish that balances the tartness of lemon. The butter should be at room temperature so it blends smoothly with sugar, creating a creamy mixture that traps air for a lighter crumb. If you’re short on butter, you can substitute with an equal amount of coconut oil, but the flavor profile will shift slightly toward tropical notes.
The Texture Crew
Cornstarch is the unsung hero that keeps the cookies soft and tender. It absorbs moisture and prevents the dough from becoming too dry during baking. Skipping cornstarch will result in a denser cookie that loses its airy quality. For a gluten‑free version, use a 1:1 blend of almond flour and oat flour, but keep the cornstarch to maintain softness.
The Unexpected Star
Coarse sparkling sugar isn’t just for show; it provides a subtle crunch that contrasts the cookie’s softness. The sugar crystals also reflect light, giving the cookies a subtle sparkle that’s visually appealing. If you can’t find sparkling sugar, substitute with coarse sea salt or finely ground sugar crystals for a similar effect.
The Final Flourish
Baking soda and baking powder are the leavening agents that give the cookies their slight lift. The soda reacts with the lemon juice to create tiny bubbles, while the powder ensures even rise. A pinch of kosher salt balances sweetness and enhances the citrus notes. If you prefer a lower sodium version, use 1/4 tsp of salt instead of 1/2 tsp.
Everything’s prepped? Good. Let’s get into the real action.
The Method — Step by Step
- Step 1: Preheat your oven to 350°F (175°C) and line two baking sheets with parchment paper. The heat should be steady, not too hot, to allow the cookies to rise evenly. This step sets the stage for a flawless bake. While the oven warms, gather all your ingredients so you can move smoothly through the process. The aroma of butter will already be teasing your senses.
- Step 2: In a large bowl, beat the softened butter and granulated sugar together on medium speed until the mixture is pale and fluffy. The creaminess will create a base that incorporates air, resulting in a light texture. Watch the color shift; it should go from creamy to a light golden hue. This is the moment the dough begins to transform into a silky foundation. Keep an eye on the timing—over‑mixing can make the cookies tough.
- Step 3: Add the fresh lemon zest, lemon juice, vanilla extract, and beaten egg to the butter mixture, stirring until fully incorporated. The citrus oils will infuse the dough, giving the cookies a bright, zesty kick. The egg acts as a binder, helping the dough hold together while still remaining tender. The vanilla deepens the flavor profile, adding a subtle warmth. This is the heart of the flavor experience.
- Step 4: In a separate bowl, whisk together the all‑purpose flour, cornstarch, baking soda, baking powder, and kosher salt. This dry mix ensures even distribution of leavening agents and prevents clumping. The cornstarch should be well‑mixed with the flour to avoid pockets of dry dough. The salt is crucial for balancing sweetness. This step is often overlooked but essential for consistent results.
- Step 5: Gradually fold the dry mixture into the wet ingredients, mixing just until the dough comes together. The dough should be soft but not sticky. Over‑mixing here will develop gluten, making the cookies tough. The dough will have a slight sheen when you feel it between your fingers. This is the point where the dough starts to feel like a buttery cloud.
- Step 6: Divide the dough into 12 equal portions and roll each into a ball about 1.5 inches in diameter. Place the dough balls on the prepared baking sheets, spacing them about 2 inches apart. The spacing allows the cookies to spread evenly without merging. Gently flatten each ball with the palm of your hand to create a slightly flattened disk. This ensures uniform baking.
- Step 7: Sprinkle the coarse sparkling sugar evenly over the top of each cookie, pressing lightly so the sugar adheres. The sugar crystals will caramelize slightly, giving a subtle crunch. The sparkle adds a visual pop that makes the cookies Instagram‑ready. This is a step that can be customized with different sugar textures for varied crunch. The sugar also helps keep the cookies from becoming too greasy.
- Step 8: Bake the cookies for 12–14 minutes, or until the edges are lightly golden and the centers look set. The cookies should still feel soft to the touch; they will firm up as they cool. The aroma will fill the kitchen, creating a citrusy, buttery scent that’s impossible to resist. Use a timer to avoid over‑baking, as this can dry out the cookies. The final step is the moment of truth.
- Step 9: Let the cookies cool on the baking sheet for 5 minutes before transferring them to a wire rack to cool completely. This short rest allows the cookies to set and the sugar crystals to firm. The cooling time also helps the flavors meld together, enhancing the lemon brightness. The cookies will still be warm, but you can handle them with a butter knife. This step is critical for a perfect crumb.
- Step 10: Store the cooled cookies in an airtight container at room temperature for up to a week, or freeze for longer storage. The cookies stay soft for days if kept in a sealed bag. When you’re ready to enjoy, let them sit at room temperature for 10 minutes to soften slightly before eating. The texture remains buttery and tender, with the lemon flavor lingering. This final step completes the journey from dough to dessert.
That's it — you did it. But hold on, I've got a few more tricks that'll take this to another level.
Insider Tricks for Flawless Results
The Temperature Rule Nobody Follows
Many bakers overlook the importance of oven temperature accuracy. A 10‑degree variance can cause the cookies to spread too much or bake unevenly. Use an oven thermometer to confirm the internal temperature, and preheat for at least 10 minutes. If your oven runs hot, set it 25°F lower to compensate. This trick ensures consistent rise and texture every time.
Why Your Nose Knows Best
When baking, your nose is the most reliable indicator of doneness. The aroma should be buttery, citrusy, and slightly sweet, without any raw dough smell. If the scent leans toward burnt, pull them out immediately. The smell is a quick, non‑visual cue that the cookies are ready. Trust your senses to avoid over‑baking.
The 5‑Minute Rest That Changes Everything
Letting the cookies rest on the baking sheet for 5 minutes before transferring them to a rack is not a waste of time. During this rest, the cookies set and the sugar crystals firm up, giving a clean break when you lift them. The dough also continues to cook slightly from residual heat, ensuring a tender crumb. Skipping this step can result in cookies that crumble when you try to move them. Make it a habit, and you’ll see the difference.
Use Cold Water for the Dough
Adding a tablespoon of cold water to the dough can help control spreading. The water hydrates the flour without activating the leavening agents too early. This results in a slightly thicker dough that holds its shape better. It’s a simple tweak that can make the cookies feel more substantial.
Freeze the Dough, Not the Cookies
For a make‑ahead option, freeze the rolled dough balls before baking. Store them on a parchment‑lined sheet in the freezer until solid, then transfer to a freezer bag. When you’re ready to bake, let them thaw at room temperature for 15 minutes before baking. This method preserves the dough’s integrity and ensures even baking.
Creative Twists and Variations
This recipe is a playground. Here are some of my favorite ways to switch things up:
Chocolate‑Lemon Fusion
Add 1/2 cup of melted dark chocolate to the dough before rolling. The chocolate introduces a rich, bittersweet undertone that pairs beautifully with the citrus. The result is a cookie that feels indulgent yet fresh. Great for chocolate lovers who crave a citrus kick.
Rosemary‑Infused Lemon Cookies
Fold 1 tablespoon of finely chopped fresh rosemary into the dough. The herb adds a subtle piney aroma that complements the lemon zest. The combination creates a sophisticated flavor profile perfect for dinner parties. The rosemary also adds a textural element with its delicate leaves.
Almond Crumble Topping
Sprinkle 1/4 cup of chopped toasted almonds over the sugar before baking. The almonds provide a nutty crunch that contrasts the cookie’s softness. The toasting step enhances the almond flavor, making each bite more complex. This variation is a hit with those who love nutty desserts.
Gluten‑Free Version
Replace the all‑purpose flour with a 1:1 blend of almond flour and oat flour. Keep the cornstarch to maintain the cookie’s softness. The result is a gluten‑free cookie that still delivers on flavor and texture. It’s a safe bet for those with dietary restrictions.
Vanilla‑Lemon Swirl
After shaping the dough, roll each ball in a thin layer of vanilla‑infused butter before baking. The vanilla butter creates a subtle swirl of flavor that adds depth. The final cookie looks beautiful with a marbled effect. Ideal for a more elegant presentation.
Storing and Bringing It Back to Life
Fridge Storage
Place the cooled cookies in a single layer in an airtight container at room temperature for up to 5 days. The airtight seal prevents the cookies from drying out. If you notice the cookies becoming slightly stale, a quick reheating in a 300°F oven for 3 minutes will revive their softness.
Freezer Friendly
Store the cooled cookies in a freezer‑safe bag, removing as much air as possible. They stay fresh for up to 3 months. Thaw at room temperature for 20 minutes before serving. The texture remains buttery and tender, with the lemon flavor intact.
Best Reheating Method
To revive the cookies, preheat your oven to 300°F (150°C). Place the cookies on a parchment‑lined sheet and bake for 4–5 minutes. The heat restores the buttery softness and reactivates the lemon aroma. If you prefer a crispier edge, add a 1‑minute burst at the end. This method works for both fresh and frozen cookies.