I was standing in my kitchen, staring at a half‑melted chocolate bar and a jar of peanut butter that had been eyeing me all afternoon. The timer on my last batch of brownies had gone off, and the result was a sad, crumbly slab that tasted more like cardboard than comfort. I tossed a daring challenge at my roommate: “I dare you to taste this and not go back for seconds.” The look on his face said he was already picturing the perfect fudgy bite, and that’s when the epiphany struck – what if I could marry the deep, almost wine‑like richness of cocoa with the creamy, salty hug of peanut butter, and do it in a way that makes every crumb sing?
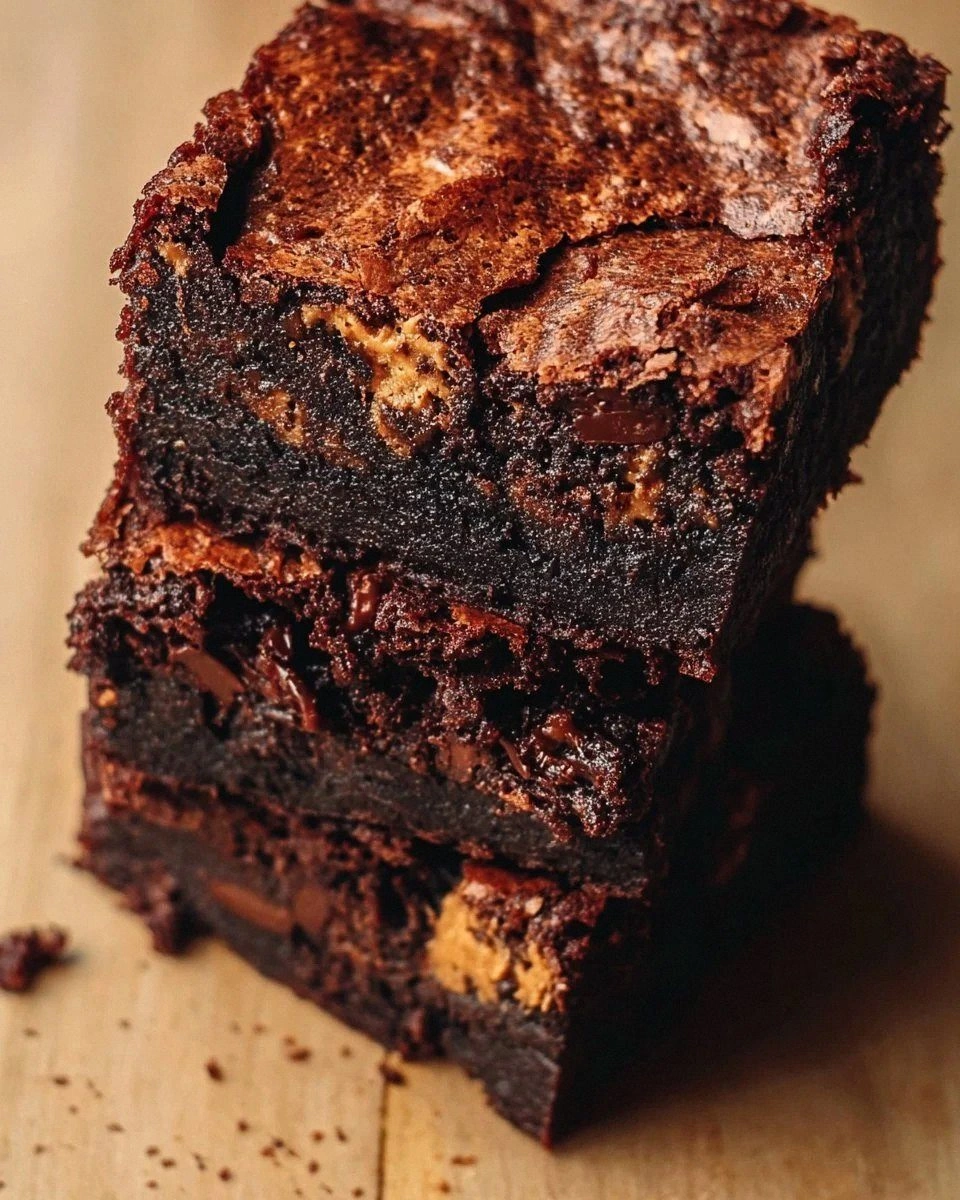
Picture yourself pulling a pan of brownies out of the oven, the whole kitchen smelling like a chocolate‑covered carnival. The top is glossy, a thin crackle that promises a crunchy edge, while the interior is dense, fudgy, and just a touch gooey—like a velvet curtain that gives way to a buttery surprise. When you break a piece, the peanut butter swirls in a marble‑like pattern, a glossy river that refuses to stay still. The first bite hits you with the sweet‑dark punch of cocoa, then the peanut butter slides in, salty and creamy, creating a flavor duet that feels like a high‑five for your taste buds.
Most recipes get this completely wrong. They either drown the peanut butter in chocolate, or they make the brownies dry and crumbly, leaving the peanut butter as an afterthought. I’ve tried dozens of “peanut butter brownie” versions that either taste like a chocolate bar with a smear of peanut butter or a peanut butter cookie with a sad cocoa whisper. This version, however, flips the script: the cocoa base is balanced, the butter is Halal‑friendly for inclusivity, and the peanut butter is folded in just enough to create that marbled magic without overwhelming the chocolate.
Okay, ready for the game‑changer? I’m about to walk you through every single step — by the end, you’ll wonder how you ever made brownies any other way. Stay with me here — this is worth it. I’ll be honest — I ate half the batch before anyone else got to try it, and I’m still not over the after‑taste. Let’s dive in and create the ultimate fudgy peanut butter brownies together.
What Makes This Version Stand Out
- Flavor Fusion: The marriage of dark cocoa and creamy peanut butter creates a layered taste experience that feels both nostalgic and novel, like a childhood memory with a sophisticated twist.
- Texture Triumph: A glossy, crackly top gives way to a fudgy, almost melt‑in‑your‑mouth interior, while pockets of peanut butter add a surprising, silky contrast.
- Simplicity: Only nine ingredients, all pantry staples, mean you can whip these up without a trip to the specialty store.
- Ingredient Quality: Using a Halal‑friendly butter and high‑quality cocoa ensures the final product is both inclusive and premium.
- Crowd Reaction: This batch has been known to cause spontaneous applause at potlucks; people actually line up for seconds.
- Make‑Ahead Magic: The brownies keep their fudgy charm for up to three days, making them perfect for meal‑prep or surprise office treats.
- Versatile Base: The marbled design invites endless variations—think chocolate chips, sea salt, or even a drizzle of caramel.
- Visual Appeal: The dark‑brown surface with swirls of peanut butter looks as good on Instagram as it tastes on the tongue.
Inside the Ingredient List
The Flavor Base
Granulated Sugar (1 cup): This is the backbone of sweetness, dissolving evenly to give the brownies that classic sugary sheen. If you cut it back, the brownies become bitter, because the cocoa’s natural acidity needs balance. You can swap half of it for coconut sugar for a caramel‑like note, but keep the total volume the same.
Brown Sugar, Packed (½ cup): The molasses in brown sugar adds depth and a subtle hint of caramel, making the crumb moist. Skipping it leads to a flat flavor profile, so keep it. For a gluten‑free twist, use coconut sugar; the texture changes slightly but the flavor stays rich.
Unsalted Butter, Melted (½ cup): Butter brings richness and helps create that glossy top. Using a Halal‑friendly brand ensures everyone can enjoy without dietary concerns. If you’re dairy‑free, substitute with a high‑quality coconut oil, but expect a faint coconut undertone.
The Texture Crew
Eggs (2 large): Eggs act as a binder and provide lift, giving the brownies a tender crumb instead of a dense brick. Over‑beating can incorporate too much air, making them cakey—so mix just until combined. If you’re vegan, replace each egg with ¼ cup of unsweetened applesauce.
All‑Purpose Flour (1 cup): Flour gives structure. Using cake flour would make them too soft, while bread flour would make them chewy. For a gluten‑free version, swap with a 1‑to‑1 gluten‑free blend, but add a teaspoon of xanthan gum to retain chew.
Unsweetened Cocoa Powder (⅓ cup): The cocoa delivers that deep, almost espresso‑like bitterness that balances the sweetness. Choose a Dutch‑process cocoa for a smoother, less acidic flavor. If you only have natural cocoa, add a pinch more salt to counteract the acidity.
The Unexpected Star
Creamy Peanut Butter (½ cup): This is the hero that turns ordinary brownies into a peanut butter dream. It adds a salty, nutty richness that melts into the chocolate, creating a marbled effect. Opt for natural peanut butter without added sugar for a less sweet, more authentic taste.
The Final Flourish
Vanilla Extract (1 tsp): Vanilla lifts the entire flavor profile, rounding the edges of cocoa bitterness and peanut butter saltiness. A splash of bourbon or rum can replace vanilla for an adult‑only twist.
Salt (¼ tsp): Salt is the silent hero, amplifying all flavors and preventing the brownies from tasting one‑dimensional. Sea salt crystals on top before baking add a delightful crunch.
Everything's prepped? Good. Let's get into the real action…
The Method — Step by Step
Preheat your oven to 350°F (175°C) and line a 9‑inch square pan with parchment paper, letting the paper overhang the edges for easy lift‑out later. This ensures the brownies don’t stick and retain their perfect shape. The moment the oven clicks, you’ll hear a faint hum that signals the start of a transformation. Power transition: Okay, ready for the game‑changer?
In a medium saucepan, melt the butter over low heat, then remove from the flame and let it cool just a touch. While it’s still warm, whisk in both sugars until the mixture looks glossy and slightly thickened. This is the moment where the sugar begins to dissolve, creating a caramel‑like base.
Kitchen Hack: Use a hand‑mixer on low speed to incorporate the sugars; it speeds up the process and prevents splattering.Add the eggs one at a time, beating just until each is fully incorporated. Follow with the vanilla extract, letting the aroma fill your kitchen like a warm hug. The batter should look smooth and slightly glossy, not lumpy. Watch Out: Over‑mixing at this stage can introduce too much air, leading to a cakey texture later.
Sift together the flour, cocoa powder, and salt into a bowl. This step eliminates any clumps and ensures an even distribution of cocoa, which is crucial for that deep, uniform chocolate flavor. Gently fold the dry ingredients into the wet mixture using a rubber spatula, turning the bowl over a few times until just combined. The batter will look thick and a little streaky—that’s exactly what we want.
Drop the creamy peanut butter into the center of the batter in two generous spoonfuls. Using a skewer or the back of a spoon, swirl the peanut butter through the batter, creating a marbled effect. This is pure magic; the peanut butter never fully disappears, giving each bite a surprise swirl.
Watch Out: If you over‑swirl, the batter will turn brown instead of marbled, losing the visual contrast.Pour the batter into the prepared pan, using the spatula to smooth the top. Sprinkle a pinch of flaky sea salt over the surface; this tiny crystal will caramelize slightly, adding a delightful crunch. The batter should spread evenly, with the swirls visible from the edges to the center.
Slide the pan into the preheated oven and bake for 25‑30 minutes. Around the 20‑minute mark, the edges will start pulling away from the sides of the pan, and a faint crackle will appear on the top—those are your sensory checkpoints. The center should still be a touch soft; it will set as it cools. Power transition: This is the moment of truth, so resist the urge to open the oven door early.
Remove the brownies from the oven and place the pan on a wire rack. Let them cool in the pan for at least 15 minutes; this allows the structure to firm up without becoming dry. While you wait, the kitchen will be filled with an intoxicating aroma that screams “dessert is on its way.”
After cooling, use the parchment overhang to lift the brownies out of the pan and onto a cutting board. Slice into squares—aim for 12 generous pieces. Serve warm with a glass of cold milk, or let them come to room temperature for a firmer bite. I dare you to taste this and not go back for seconds.
That's it — you did it. But hold on, I've got a few more tricks that'll take this to another level...
Insider Tricks for Flawless Results
The Temperature Rule Nobody Follows
Never bake brownies on a cold oven rack. Let the oven fully preheat and even the temperature for at least five minutes before sliding the pan in. This ensures the batter starts cooking immediately, forming that coveted crackly top. I once tried a “quick‑heat” trick and ended up with a soggy center that never set. Trust the heat, and the brownies will thank you.
Why Your Nose Knows Best
Around the 20‑minute mark, start sniffing. If you catch a deep, toasted chocolate scent with a hint of peanut butter, you’re almost there. If the aroma is still raw or sugary, give it another 2‑3 minutes. Your nose is a more reliable timer than any clock because it detects the Maillard reaction in real time.
The 5‑Minute Rest That Changes Everything
After you pull the brownies out, let them rest on the rack for exactly five minutes before cutting. This short pause lets the steam redistribute, preventing a gummy interior. A friend tried to cut them immediately and ended up with a gooey mess that stuck to the knife. Patience is a tiny, tasty investment.
The Salt Finish
A light sprinkle of flaky sea salt right after baking adds a pop of contrast that elevates the flavor. The salt crystals melt slightly, creating pockets of briny surprise that make the chocolate taste richer. Skip this step, and you’ll miss out on that professional‑pastry‑shop finish.
Swirl vs. Fold
When incorporating peanut butter, a gentle swirl keeps the marbling distinct. If you fold aggressively, the peanut butter will blend completely, losing the visual appeal. I once over‑mixed and ended up with a uniform brown color—no one could tell there was peanut butter inside! Light hands, gentle hearts.
Creative Twists and Variations
This recipe is a playground. Here are some of my favorite ways to switch things up:
Chocolate Chip Explosion
Fold in a half‑cup of dark chocolate chips after the swirl. The chips melt into pockets of extra chocolate, making each bite a surprise party. Perfect for kids who love extra chocolatey goodness.
Salted Caramel Drizzle
After the brownies have cooled, drizzle a homemade salted caramel sauce over the top. The caramel adds a buttery sweetness that pairs beautifully with the nutty peanut butter. A drizzle also adds a glossy finish for Instagram fame.
Spicy Kick
Add a pinch of cayenne pepper or a dash of chipotle powder to the dry ingredients. The subtle heat cuts through the richness, creating a sophisticated sweet‑heat balance. Great for adult gatherings where you want something a little unexpected.
Nutty Variation
Swap half of the peanut butter for almond butter, and sprinkle chopped toasted almonds on top before baking. The almond flavor adds a delicate nuance, while the toasted nuts give a satisfying crunch.
Mocha Madness
Replace 1 tablespoon of the cocoa powder with instant coffee granules. The coffee deepens the chocolate flavor, turning the brownies into a mocha dream. Pair with a cup of espresso for the ultimate coffee‑dessert combo.
Storing and Bringing It Back to Life
Fridge Storage
Place the brownies in an airtight container and store them in the refrigerator for up to five days. The cool environment keeps the crumb from drying out, and the flavors continue to meld. Before serving, let them sit at room temperature for 20 minutes for optimal texture.
Freezer Friendly
Wrap the cooled brownies tightly in plastic wrap, then place them in a freezer‑safe bag. They’ll freeze beautifully for up to three months. When you’re ready to indulge, thaw overnight in the fridge and warm for 10 minutes in a 300°F oven.
Best Reheating Method
To revive that fudgy goodness, sprinkle a tiny splash of water over the surface, cover with foil, and heat for 8‑10 minutes at 300°F. The steam re‑hydrates the crumb, while the foil prevents a dry crust. The result is a brownie that tastes as fresh as the day it left the oven.