I still remember the first time I tried to impress someone with stuffed mushrooms. It was a disaster of epic proportions — I used button mushrooms from the grocery store, over-stuffed them with a bland cream cheese mixture, and served them lukewarm to a date who politely took one bite and then asked if we could order pizza instead. Fast forward five years, and I'm standing in my kitchen with a handful of fresh morels that cost more than a decent bottle of wine, wondering if lightning would strike twice. But here's the thing: when you treat morels with the respect they deserve, when you understand that these honeycomb-capped treasures are basically nature's flavor sponges, magic happens. The earthy, nutty aroma that filled my kitchen that day was nothing short of intoxicating, and the resulting stuffed morels were so good that I shamelessly ate the entire batch standing over the counter, no plate required.
What makes these stuffed morels different from every other recipe floating around the internet? It's not just about stuffing mushrooms with cheese and calling it a day. We're talking about coaxing maximum flavor from every single component, creating a filling that's so luxuriously creamy it should come with a warning label, and achieving that perfect textural contrast between the tender mushroom and the golden-crispy topping. The secret lies in understanding that morels aren't just regular mushrooms with fancy hats — they're umami bombs that, when treated right, will make you question why you ever bothered with those sad, pale button mushrooms.
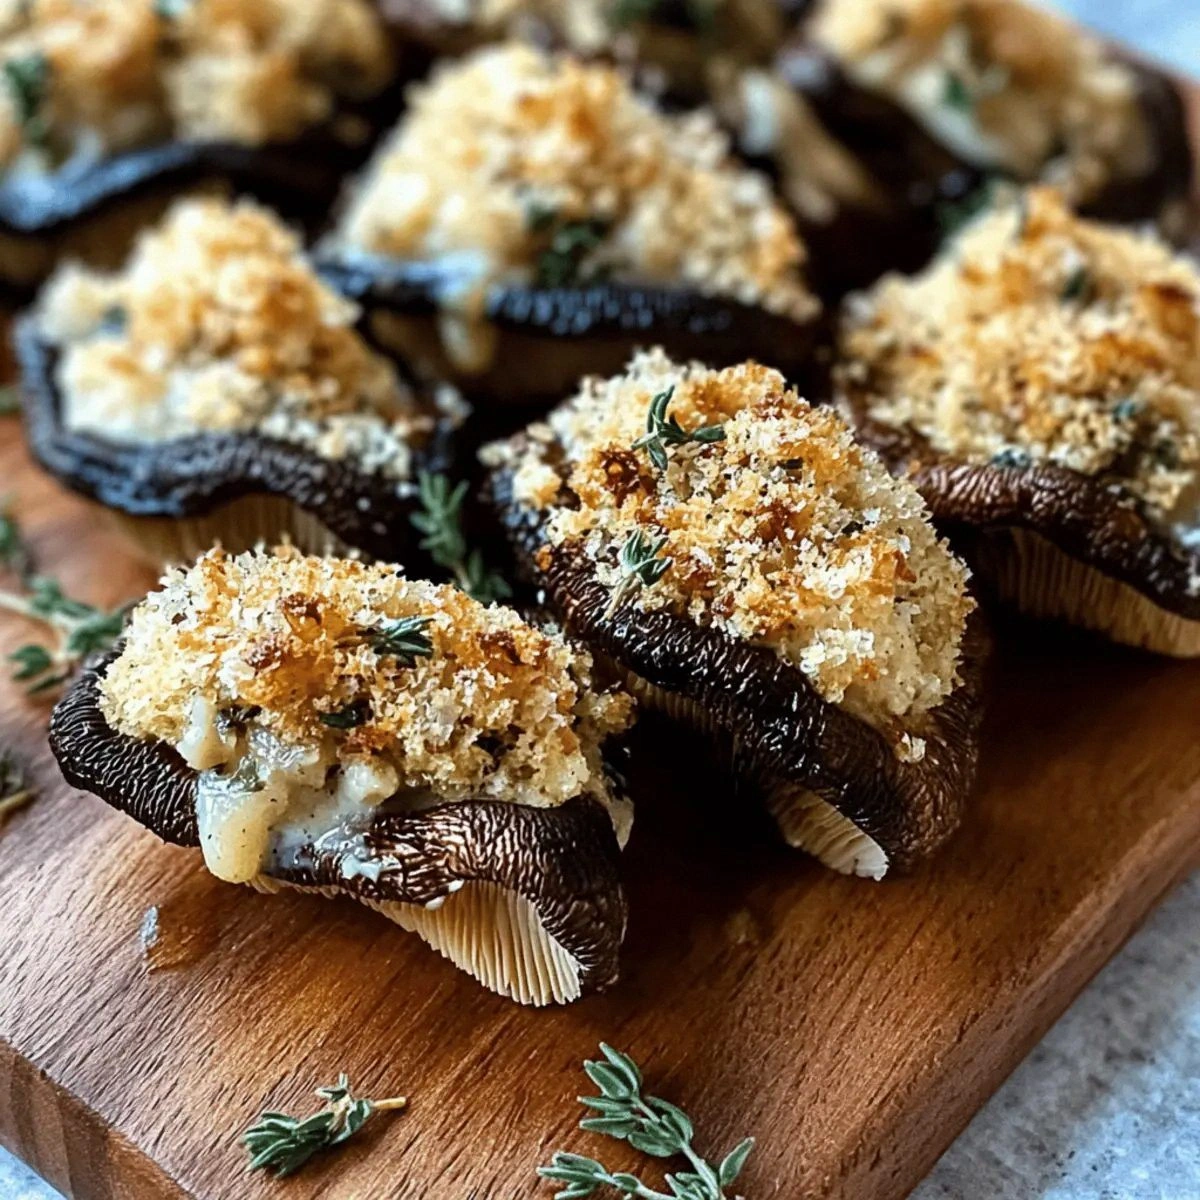
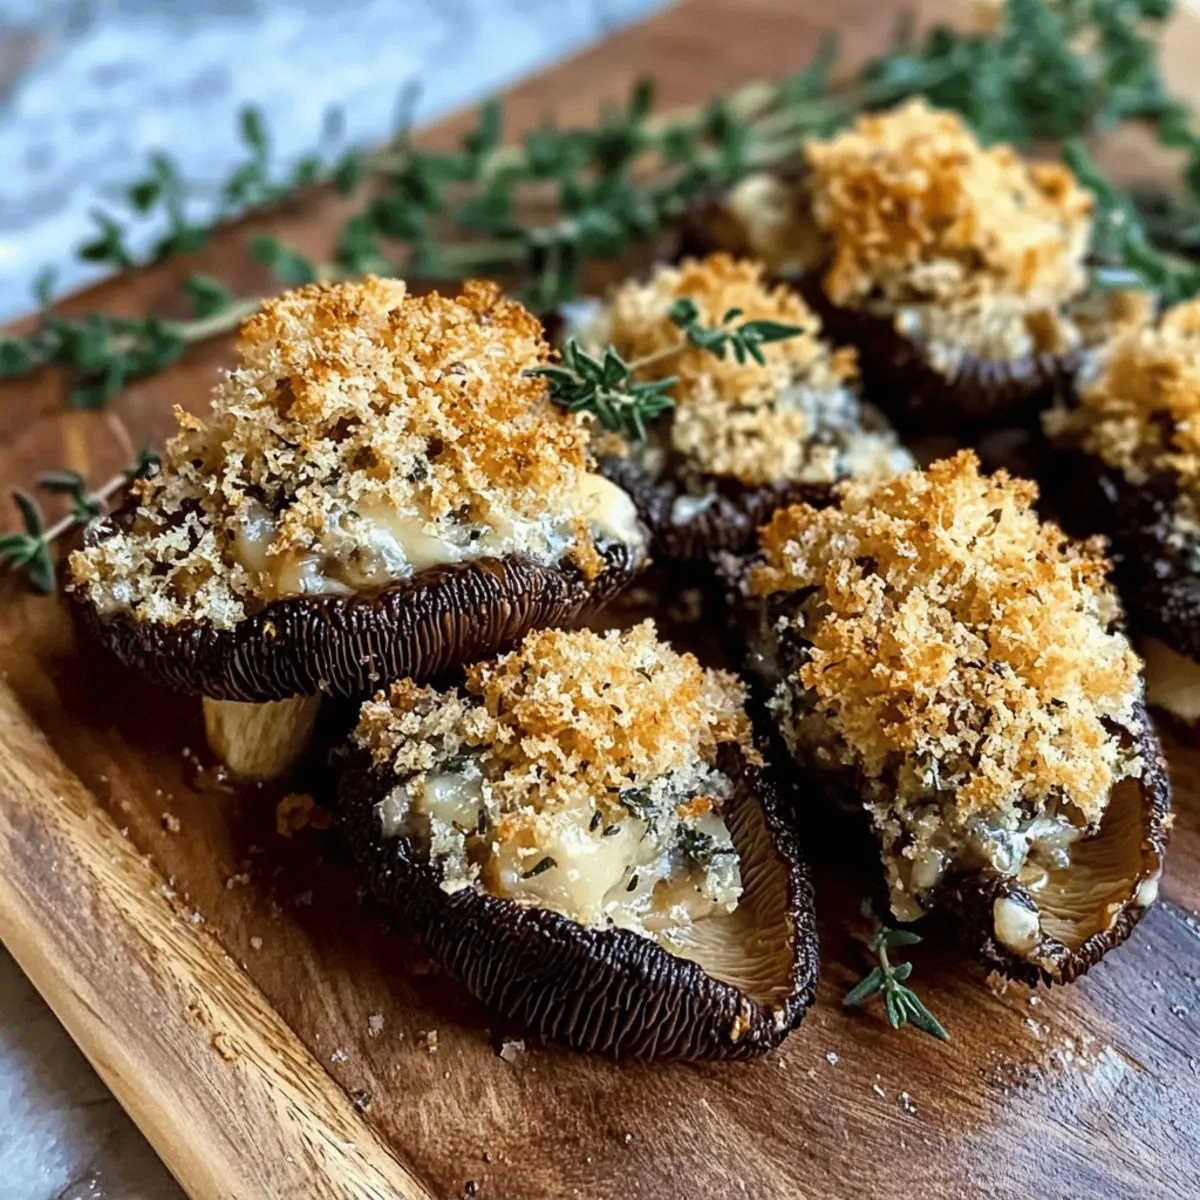
Picture this: the morels are hollowed out just enough to create perfect little cups, their earthy perfume mingling with the scent of fresh thyme as it hits warm cream cheese. There's lemon juice brightening everything up, Worcestershire sauce adding that mysterious depth, and panko breadcrumbs that toast to golden perfection in butter. When these emerge from your oven, the kitchen fills with an aroma that's part forest floor after rain, part French bistro, and entirely irresistible. I dare you to taste one and not go back for seconds — actually, I dare you to stop at seconds.
Okay, ready for the game-changer? We're using umami seasoning — that magical blend of mushrooms, seaweed, and fermented goodness — to amplify the natural flavors of the morels. Most recipes get this completely wrong by either drowning the mushrooms in too many competing flavors or being so timid with seasoning that you might as well be eating cardboard. This version strikes the perfect balance, letting the morels be the star while giving them a supporting cast that makes them shine even brighter. Let me walk you through every single step — by the end, you'll wonder how you ever made it any other way.
What Makes This Version Stand Out
This isn't just another stuffed mushroom recipe — this is the stuffed mushroom recipe that will ruin all others for you forever. The combination of techniques and ingredients here creates something that's greater than the sum of its parts, elevating humble ingredients into something worthy of a special occasion or an ordinary Tuesday that just needs some excitement.
- Umami Amplification: By using umami seasoning alongside the naturally umami-rich morels, we're creating a flavor explosion that hits every taste bud. It's like turning the volume up to eleven on savoriness without overwhelming the delicate mushroom flavor.
- Texture Paradise: The contrast between the tender morel, the creamy filling, and the crunchy panko topping creates a textural experience that keeps every bite interesting. No more boring, mushy stuffed mushrooms.
- Fresh Herb Magic: Fresh thyme brings a lemony, slightly minty note that cuts through the richness of the cream cheese, preventing the filling from becoming too heavy or one-dimensional.
- Acid Balance: The lemon juice and Worcestershire sauce work together to brighten the entire dish, ensuring that despite all the richness, your palate stays refreshed and ready for the next bite.
- Make-Ahead Friendly: These can be stuffed up to 24 hours ahead of time, making them perfect for entertaining. Just pop them in the oven when guests arrive and serve them hot and bubbly.
- Restaurant-Quality Results: Despite using simple techniques, the final dish looks and tastes like something you'd pay $18 for as an appetizer at a fancy restaurant.
- Seasonal Star Power: Morels have a short season, making this dish feel special and fleeting — the culinary equivalent of catching lightning in a bottle.
Alright, let's break down exactly what goes into this masterpiece. Each ingredient has been carefully selected to play a specific role in the flavor orchestra we're conducting here. Understanding why each component matters will help you make smart substitutions when needed and troubleshoot any issues that might arise.
Inside the Ingredient List
The Flavor Foundation
Morel mushrooms are the undisputed stars of this show, and they deserve every bit of attention they get. These honeycomb-capped beauties have an earthy, nutty flavor that's more complex than regular mushrooms, with hints of wood smoke and roasted nuts. When selecting morels, look for ones that are firm and dry, not mushy or slimy — they should smell like a forest after rain, not like compost. The hollow structure of morels makes them perfect for stuffing, creating natural little cups that hold the filling beautifully. If you can only find smaller morels, don't worry — just make more of them and reduce the cooking time slightly.
Cream cheese forms the luxurious base of our filling, providing that rich, tangy backdrop that makes everything taste indulgent. Make sure it's fully softened before you start mixing — cold cream cheese will fight you every step of the way, creating lumpy filling that no amount of mixing will smooth out. Full-fat cream cheese is non-negotiable here; the low-fat stuff breaks down when heated and becomes watery, ruining the texture of your filling. Let it sit on the counter for at least an hour before you start, or if you're impatient like me, microwave it in 10-second bursts until it's spreadable but not melted.
The Aromatics and Seasonings
Fresh thyme is the herb that understands morels on a spiritual level — they both share those earthy, woodsy notes that make them taste like they were destined to be together. Dried thyme won't work here; it lacks the bright, lemony undertones that fresh thyme brings to the party. Strip the leaves off the stems by holding the top and running your fingers downward — it's oddly satisfying and much faster than picking individual leaves. If you absolutely must substitute, fresh rosemary would work, but use half the amount since it's much more aggressive.
Umami seasoning is where we separate the amateurs from the pros. This magical blend typically includes dried mushrooms, seaweed, tomato powder, and sometimes fermented ingredients like miso powder. It's like MSG's sophisticated cousin who studied abroad and came back with refined taste. If you can't find umami seasoning, you can create your own by grinding dried porcini mushrooms with a pinch of nori and some garlic powder. This ingredient is what makes people take a bite and immediately ask "what's in this?" in the best possible way.
The Brightness Brigade
Lemon juice might seem like an odd addition to a mushroom dish, but it's essential for cutting through the richness of the cream cheese and brightening the earthy morel flavor. Use fresh lemon juice — the bottled stuff has a metallic aftertaste that will throw off the entire balance of the dish. The acid also helps prevent the cream cheese filling from becoming too heavy, keeping each bite refreshing despite all that richness. Don't be tempted to add more than called for; too much acid will make the cream cheese filling break and become grainy.
Worcestershire sauce is the mystery ingredient that makes people ask for your secret recipe. It's complex blend of vinegar, molasses, anchovies, and spices adds layers of flavor that would take hours to build from scratch. Just a teaspoon is enough to add that indefinable depth that separates good cooking from great cooking. If you're vegetarian, you can substitute with soy sauce mixed with a tiny bit of balsamic vinegar, but Worcestershire really is the gold standard here.
The Texture Team
Italian seasoned panko breadcrumbs are going to give us that golden, crispy crown that shatters like thin ice when you bite into it. Panko is lighter and airier than regular breadcrumbs, creating a crunch that's almost tempura-like without being heavy. The Italian seasoning adds herbs and garlic that complement the thyme in the filling. If all you have is plain panko, toss it with a pinch of dried oregano, garlic powder, and some grated Parmesan before using. The contrast between the creamy filling and crunchy topping is what transforms this from good to unforgettable.
Salted butter might seem basic, but it's crucial for achieving that perfect golden color and rich flavor in our breadcrumb topping. Butter helps the breadcrumbs brown evenly while adding a nutty richness that oil just can't match. Don't substitute with margarine — it has too much water and will make your topping soggy instead of crisp. The salt in the butter also helps balance the sweetness of the morels and enhances all the other flavors in the dish.
Everything's prepped? Good. Let's get into the real action...

The Method — Step by Step
-
Start by cleaning your morels properly — and I cannot stress this enough, do not rinse them under running water. Morels are like little sponges and will absorb water, becoming soggy and waterlogged. Instead, use a dry pastry brush or a clean toothbrush to gently brush away any dirt or debris from the honeycomb crevices. If you encounter stubborn dirt, you can quickly dunk them in a bowl of cold water and immediately pat them dry with paper towels, but work fast. Once clean, use a small paring knife or a grapefruit spoon to gently hollow out the inside of each morel, creating a cavity for the filling while keeping the walls intact. This next part? Pure magic.
-
Preheat your oven to 375°F (190°C) and position a rack in the center. While the oven heats, make the filling by combining the softened cream cheese, fresh thyme leaves, umami seasoning, lemon juice, Worcestershire sauce, black pepper, and salt in a medium bowl. Use a rubber spatula to fold everything together until it's completely smooth and homogeneous. The mixture should be easily spreadable but hold its shape — if it's too stiff, add a teaspoon of milk; if it's too loose, chill it for 10 minutes. This is the moment of truth where all your flavors come together, so taste it and adjust the seasoning if needed.
-
Now comes the fun part — stuffing the morels. Use a small spoon or pipe the filling using a zip-top bag with the corner snipped off. Fill each morel until the filling is just level with the top; don't overfill or the filling will ooze out during baking. Place the stuffed morels on a parchment-lined baking sheet as you work, making sure they're not touching. The smell of the fresh thyme hitting the cream cheese should be making your kitchen smell like a French countryside cottage by now. If you've ever struggled with stuffing mushrooms before, you're not alone — and I've got the fix.
-
Melt the butter in a small skillet over medium heat until it's foamy and just starting to turn golden. Add the panko breadcrumbs and stir constantly for 2-3 minutes until they're golden brown and smell like buttery, garlicky heaven. Don't walk away from the stove here — panko goes from perfectly golden to burnt in the blink of an eye. Once toasted, remove from heat and let cool for a minute. This toasted breadcrumb topping is what's going to give our morels that restaurant-quality crunch that makes people think you're a culinary genius.
-
Sprinkle the toasted panko mixture evenly over the tops of the stuffed morels, pressing down gently so it adheres to the filling. You want a nice, even layer that covers the filling completely — this creates a barrier that keeps the filling moist while the topping gets crispy. Any leftover breadcrumbs can be saved for sprinkling over pasta or salads later. The contrast between the golden breadcrumbs and the dark morels should already be making your mouth water.
-
Bake the morels for 18-22 minutes, until the filling is heated through and the breadcrumbs are deeply golden. You'll know they're done when the filling is bubbling up slightly around the edges and the kitchen smells like an upscale restaurant. That sizzle when they hit the hot pan? Absolute perfection. Let them rest for 5 minutes before serving — this allows the filling to set slightly and prevents molten cream cheese burns that will ruin your appreciation of these beauties.
-
Serve these hot, garnished with a few extra thyme leaves if you're feeling fancy. They're perfect as an appetizer with a crisp white wine, or as part of a mushroom-themed dinner party that will have your guests talking for weeks. The combination of the earthy morel, creamy filling, and crunchy topping creates a three-act play of textures and flavors that keeps every bite interesting. Picture yourself pulling this out of the oven, the whole kitchen smelling incredible, and your guests' eyes widening as they realize they're about to taste something truly special.
-
That's it — you did it. But hold on, I've got a few more tricks that'll take this to another level. These insider secrets are what separate the good cooks from the ones who have people begging for their recipes. Whether you're a seasoned chef or someone who just learned how to turn on their oven, these tips will ensure your stuffed morels are flawless every single time.
Insider Tricks for Flawless Results
The Temperature Rule Nobody Follows
Room temperature ingredients aren't just a suggestion — they're the difference between smooth, luxurious filling and a lumpy mess that looks like it was mixed by a toddler. Your cream cheese, lemon juice, and even Worcestershire sauce should all be at room temperature before you start mixing. Cold ingredients don't incorporate properly, leaving you with pockets of unmixed cream cheese that will melt unevenly during baking. I learned this the hard way when I rushed through making these for a dinner party and ended up with filling that looked like cottage cheese — technically edible, but not exactly impressive. Take the extra 30 minutes to let everything come to temperature, and your filling will be silky smooth and perfectly incorporated.
Why Your Nose Knows Best
Your sense of smell is your most valuable tool when making these stuffed morels. When the panko is perfectly toasted, it will smell like buttery, garlicky heaven — nutty and golden. If it starts to smell even slightly bitter or burnt, you've gone too far and need to start over. The morels themselves should smell earthy and slightly sweet, never musty or sour. A friend tried skipping this step once — let's just say it didn't end well. Trust your nose when checking if the filling is properly seasoned too — it should smell bright from the lemon and thyme, with a deep savory note from the umami seasoning. If all you smell is cream cheese, you need more seasoning.
The 5-Minute Rest That Changes Everything
I'll be honest — I ate half the batch before anyone else got to try them, and I burned my tongue because I didn't wait for them to cool slightly. Don't be like me. Those five minutes of resting time allow the filling to set, preventing it from oozing out like lava when you bite into the hot mushroom. The breadcrumbs also continue to crisp as they cool, achieving that perfect golden color and shattering texture. More importantly, the flavors have time to meld and intensify — it's like the difference between a good soup and one that's been simmering all day. If you serve these immediately, they'll still be good, but that brief rest transforms them from great to absolutely transcendent.
The Size Sorting Secret
Morels, being wild mushrooms, never grow to uniform sizes — it's part of their charm but can make cooking them evenly a challenge. The pros know to sort their morels by size before stuffing them. Large morels need an extra 2-3 minutes in the oven, while tiny ones might be done in just 15 minutes. By grouping them together on the baking sheet, you can pull out the smaller ones early and let the larger ones continue cooking. This ensures every mushroom is perfectly cooked, with tender caps and heated-through filling, rather than some being overcooked while others are still cold in the center.
The Make-Ahead Magic Formula
Most recipes get this completely wrong. Here's what actually works: you can stuff the morels up to 24 hours ahead, but don't add the breadcrumb topping until just before baking. Store the stuffed morels covered in the refrigerator, and keep the toasted panko in an airtight container at room temperature. When you're ready to bake, just sprinkle on the panko and pop them in the oven. If you add the breadcrumbs ahead of time, they'll absorb moisture from the filling and become soggy — a tragedy of epic proportions that will ruin that perfect textural contrast we're after.
The Seasoning Sweet Spot
The difference between good and great stuffed morels lies in understanding that mushrooms need more salt than you think. They absorb seasoning like they absorb water — enthusiastically and without apology. Season the filling generously, then taste it on a neutral vehicle like a plain cracker. It should taste slightly over-seasoned, because once it's inside the mushroom and baked, the seasoning will mellow significantly. Most people under-season mushroom dishes because they're afraid of over-salting, resulting in bland, disappointing results. Trust yourself and season boldly — your taste buds will thank you.
Creative Twists and Variations
This recipe is a playground. Here are some of my favorite ways to switch things up:
The French Onion Upgrade
Replace half the cream cheese with caramelized onions that have been cooked down until they're jammy and sweet. Add a pinch of fresh rosemary instead of thyme, and top with a mixture of panko and grated Gruyère cheese. The result tastes like French onion soup met stuffed mushrooms and had a beautiful baby. This version is particularly good in the fall when you want that cozy, comfort food feeling.
The Mediterranean Makeover
Swap the thyme for fresh oregano and add some finely chopped sun-dried tomatoes and Kalamata olives to the filling. Use lemon zest instead of lemon juice for a brighter flavor, and replace the panko with a mixture of panko and finely chopped pine nuts. This version pairs beautifully with a crisp Greek white wine and makes you feel like you're dining on a Mediterranean terrace.
The Truffle Transformation
Add a few drops of truffle oil to the filling (a little goes a long way), replace the Worcestershire with white truffle paste, and mix some finely chopped fresh chives into the cream cheese. Top with a mixture of panko and a tiny amount of truffle salt. This is the version for when you want to feel fancy without spending a fortune on actual truffles.
The Bacon Lover's Dream
Cook 3 strips of bacon until crispy, crumble them finely, and fold them into the filling along with a teaspoon of the bacon fat. Replace the butter with bacon fat for toasting the panko, and add a pinch of smoked paprika to the filling. This version is dangerously addictive and perfect for converting mushroom skeptics into believers.
The Vegan Victory
Replace the cream cheese with a mixture of cashew cream and nutritional yeast for that cheesy flavor. Use olive oil instead of butter for the panko, and add some finely chopped fresh parsley for brightness. The umami seasoning becomes even more important here, so don't skip it. Even hardcore cheese lovers often can't tell the difference.
The Breakfast Remix
Add a softly poached quail egg to each stuffed morel just before serving, so the yolk creates a sauce when you cut into it. Add some finely chopped fresh chives to the filling and serve these alongside champagne for the most decadent brunch you've ever experienced. This is how you impress your future in-laws or celebrate a promotion in style.
Storing and Bringing It Back to Life
Fridge Storage
Store any leftover stuffed morels in an airtight container in the refrigerator for up to 3 days, though they're best within the first 24 hours. Separate layers with parchment paper to prevent them from sticking together and ruining that perfect breadcrumb topping. The key to maintaining quality is to let them cool completely before refrigerating — warm morels will create condensation that makes the breadcrumbs soggy. If you know you'll have leftovers, consider storing the panko topping separately and adding it when you reheat them.
Freezer Friendly
These freeze beautifully for up to 2 months, making them perfect for impromptu entertaining. Freeze them on a baking sheet first, then transfer to a freezer bag once solid — this prevents them from sticking together. When you're ready to enjoy them, thaw overnight in the refrigerator and reheat in a 350°F oven for 12-15 minutes. The texture won't be quite as perfect as fresh, but they'll still be delicious and miles ahead of any frozen appetizer you'd buy at the store.
Best Reheating Method
The toaster oven is your best friend for reheating these beauties — it crisps up the topping while heating the filling evenly. Add a tiny splash of water before reheating — it steams back to perfection and prevents the filling from drying out. Avoid the microwave at all costs unless you enjoy soggy breadcrumbs and rubbery mushrooms. If all you have is a regular oven, reheat them on a wire rack set over a baking sheet so hot air can circulate underneath, ensuring they heat evenly and the bottoms don't get soggy.