The kitchen had been a battlefield that night, the kind of disaster that turns a simple dinner into a culinary lesson. I had tried to recreate a take‑out Mongolian beef dish from a food blog, but the result was a soggy, flavorless mess that left my taste buds questioning every decision I’d made. My friend, a self‑proclaimed “food wizard,” dared me to make a plant‑based version that could rival the original. I accepted the challenge, and the chaos that followed taught me that the secret to a great sauce is not just the ingredients, but the way you treat them.
The craving for that sweet‑savory, slightly smoky bite had been gnawing at me all week. I could taste it even before the first stir of the pan, the promise of a glossy glaze that would cling to every morsel. The idea of a hearty, cruelty‑free dish that could satisfy a crowd seemed almost too good to be true. Yet the kitchen’s lingering scent of burnt garlic from last night’s experiment reminded me that perfection is a process, not a single moment.
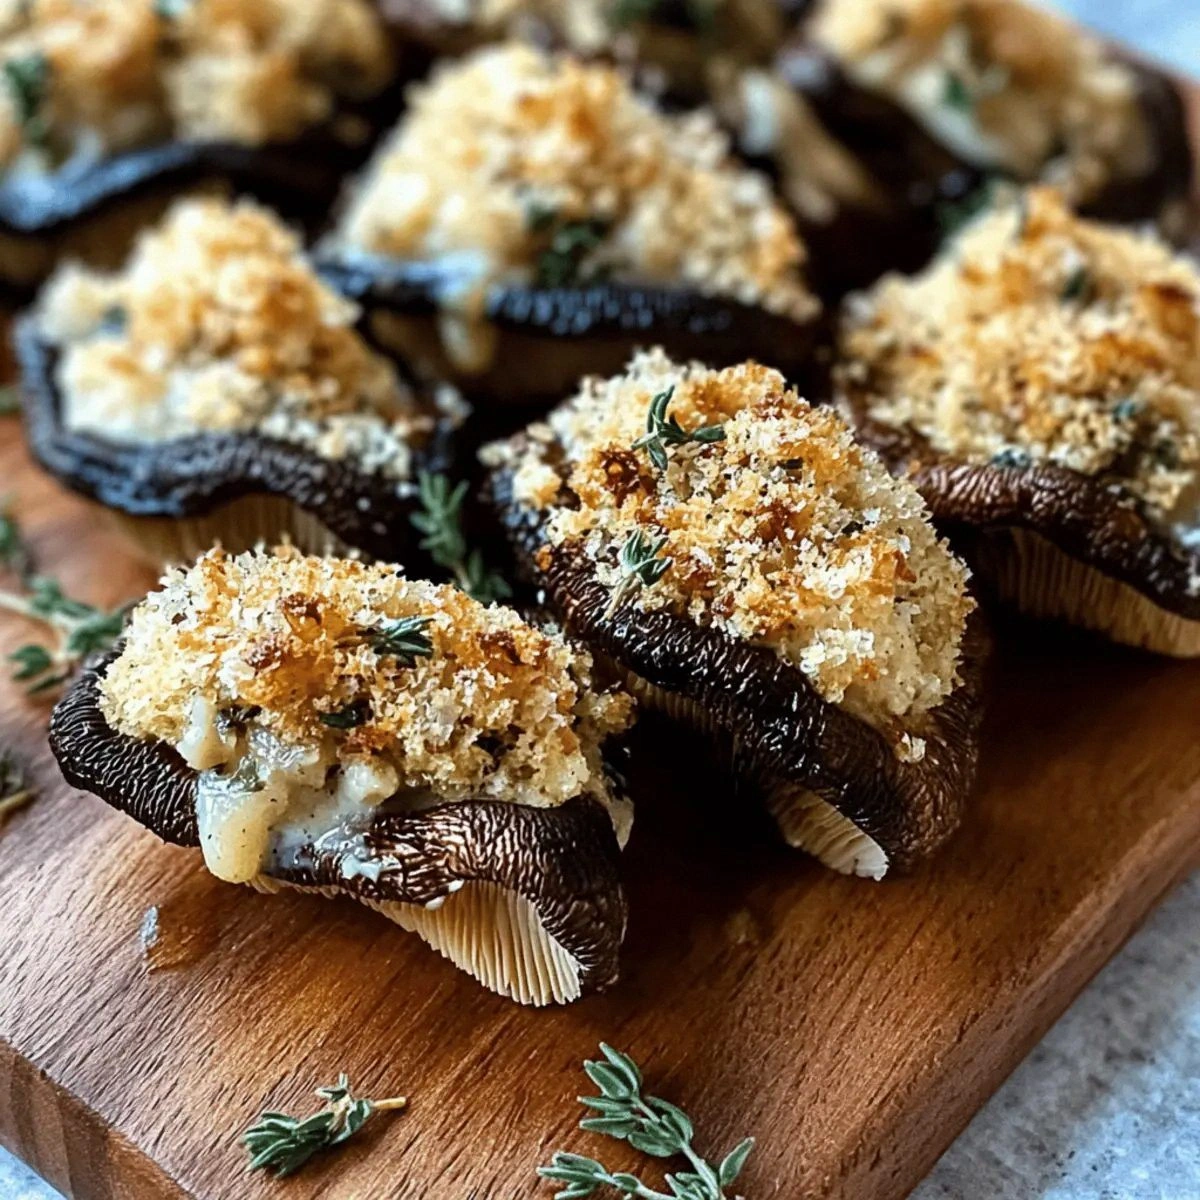
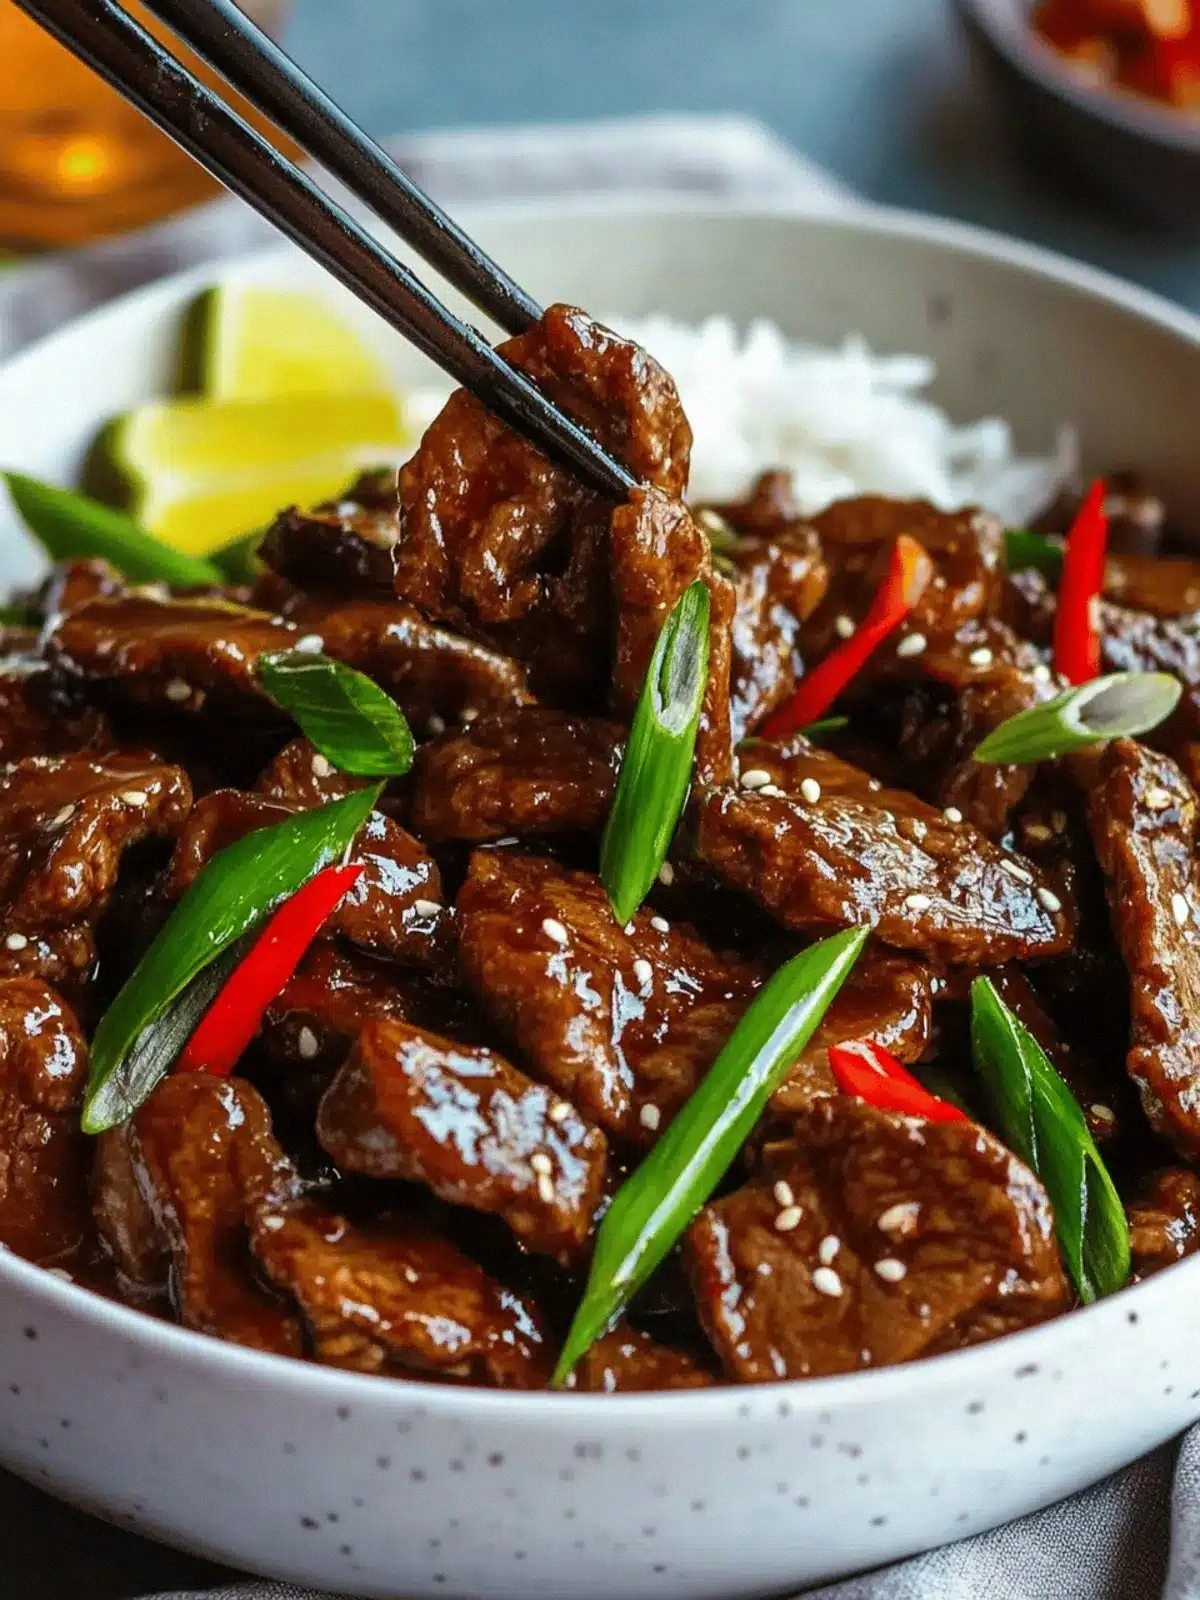
Picture this: a sizzling wok, the air thick with the aroma of fresh ginger and garlic, the sound of a wooden spoon slapping the pan like a drumbeat. The visual is a palette of earthy browns from mushrooms, the deep umber of soy sauce, and the bright green of scallions. The texture is a mix of chewy soy chunks, crisp mushroom caps, and a silky sauce that coats like velvet. The taste is an explosion of umami, a sweet bite from brown sugar, and a subtle kick from Shaoxing wine. The feel of the wok’s heat against my palm is a reminder that cooking is both science and art.
What makes this version stand out is not just the ingredients but the method that elevates each component to its peak. I’ve stripped away the excess oil, added a cornstarch slurry that gives the sauce a glossy, clingy finish, and used dry soy chunks that provide a meaty bite without the heaviness of tofu. The mushrooms are sliced thin and sautéed until they caramelize, creating a depth of flavor that would otherwise be missing. The result is a dish that feels indulgent, yet is light enough to be served over steamed rice or noodles.
I dare you to taste this and not go back for seconds. The sauce’s thickness will cling to each piece of soy chunk and mushroom, while the scallions add a fresh pop that cuts through the richness. The dish is hands down the best version you’ll ever make at home, a plant‑based marvel that will have your friends begging for the recipe. I’ll be honest — I ate half the batch before anyone else got to try it, and the leftovers still taste as fresh as the first serving.
Most recipes get this completely wrong by over‑cooking the mushrooms or using too much oil, but here, everything is balanced. The soy chunks soak up the sauce without becoming mushy, and the mushrooms add a chewy contrast that keeps every bite interesting. Picture yourself pulling this out of the wok, the whole kitchen smelling incredible, and the plate shining with a glossy glaze that invites a second bite. And now the fun part: let me walk you through every single step — by the end, you’ll wonder how you ever made it any other way.
What Makes This Version Stand Out
- Texture: The dry soy chunks provide a chewy, meat‑like bite that holds up against the sauce, while the mushrooms add a satisfying snap that contrasts beautifully.
- Flavor Depth: A blend of light soy sauce, dark soy, and Shaoxing wine creates a layered umami profile that is far richer than standard stir‑fries.
- Glaze: A cornstarch slurry gives the sauce a silky, glossy finish that clings to every ingredient, turning the dish into a visual and gustatory treat.
- Ingredient Quality: Using fresh mushrooms and high‑quality soy sauce elevates the dish from a quick meal to a gourmet experience.
- Time Efficiency: The entire process takes under 45 minutes, making it perfect for weeknight dinners without sacrificing flavor.
- Make‑Ahead Friendly: The sauce can be prepared in advance and reheated without losing its texture, making it ideal for meal prep.
- Plant‑Based Perfection: It satisfies carnivores and vegans alike, proving that hearty comfort food can be both cruelty‑free and unforgettable.
Alright, let's break down exactly what goes into this masterpiece. The ingredients are simple yet powerful, each playing a crucial role in the overall harmony of the dish.
Inside the Ingredient List
The Flavor Base
Soy sauce is the backbone of this dish, providing a salty, umami foundation that is essential for depth. The combination of light and dark soy creates a subtle gradient of flavor, where the dark soy adds a slightly sweet, molasses‑like richness. If you skip this step, the dish loses its signature depth and feels flat.
Brown sugar is the sweet counterpoint to the soy, caramelizing as it cooks and giving the sauce a glossy sheen. It also balances the saltiness of the soy sauces and brings a gentle caramel flavor that lingers on the palate. Replacing it with maple syrup or agave nectar will alter the taste profile, making it less traditional.
Shaoxing wine is a Chinese cooking wine that adds a subtle, nutty aroma. Its addition deepens the sauce’s complexity and provides a hint of sweetness that complements the sugar. If you cannot find Shaoxing wine, dry sherry or a splash of rice wine can serve as a suitable substitute.
The Texture Crew
Dry soy chunks are the star of the show, delivering a meaty texture that satisfies the craving for beef without the animal product. They absorb the sauce beautifully, creating a chewy bite that is reminiscent of real steak. If you use tofu instead, the texture becomes more spongy and less satisfying.
Cornstarch is the secret weapon for achieving that silky glaze. When dissolved in a cold liquid, it forms a slurry that thickens the sauce without making it cloudy. Adding the slurry at the end of cooking ensures the sauce remains glossy and clingy.
Neutral oil, such as canola or grapeseed, provides the necessary heat for sautéing without adding flavor. Using a flavored oil like sesame would overpower the delicate balance of the sauce. The oil’s high smoke point also prevents burning during the high‑heat stir‑fry.
The Unexpected Star
Fresh mushrooms add earthiness and a meaty depth that complements the soy chunks. Their umami profile enhances the overall flavor, making the dish more complex. Choosing button or cremini mushrooms keeps the cost low while delivering maximum flavor.
Ginger and garlic bring brightness and a sharp kick that cuts through the richness of the sauce. Their aromatic compounds release as they cook, infusing the oil and creating a fragrant base. If you skip them, the dish will feel flat and lack the signature zing of a traditional Mongolian beef.
Green onions, or scallions, provide a fresh, crisp finish that balances the dish’s richness. The white part adds a subtle onion flavor, while the green part adds a hint of peppery freshness. Removing them would make the dish feel heavy and less vibrant.
The Final Flourish
The final flourish involves adding a splash of water to the sauce after it thickens. This step ensures the sauce remains silky and prevents it from drying out on the stovetop. It also helps the sauce cling better to the soy chunks and mushrooms.
Sautéing the mushrooms until they develop a golden crust locks in their moisture and creates a caramelized flavor that adds depth to the dish. This caramelization is a key step; if you rush it, you’ll miss out on the complex, nutty notes that make the dish memorable.
Everything's prepped? Good. Let's get into the real action.
The Method — Step by Step
Before you fire up the wok, make sure your pan is hot enough to sizzle the oil. A hot pan ensures the soy chunks get a quick sear and develop a caramelized exterior. This step is critical; if the pan is too cool, the chunks will steam instead of sear, resulting in a mushy texture. The aroma that rises from the pan is the first hint that you’re on the right track. Now, let’s dive into the cooking process.
- Heat the neutral oil in a wok or large skillet over high heat until it shimmers. Add the dry soy chunks and stir‑fry for 3–4 minutes until they develop a golden crust. This quick sear locks in flavor and creates a satisfying bite. Keep the chunks moving so they don’t burn. The sizzling sound is a cue that the pan is hot enough.
- Push the soy chunks to one side of the pan and add the sliced mushrooms. Sauté for 2–3 minutes until they release moisture and begin to brown. The mushrooms should develop a caramelized edge that adds depth. Stir occasionally to prevent sticking. This step builds the foundation of the sauce.
- In a small bowl, combine the ginger, garlic, and a splash of water. Add this aromatics mixture to the pan and sauté for 30 seconds until fragrant. This releases essential oils that enhance the overall flavor profile. The aroma should be sharp and inviting. Avoid letting the garlic burn.
- Pour in the light soy sauce, dark soy sauce, and Shaoxing wine. Stir to combine and allow the mixture to simmer for 2 minutes. This creates the base of the sauce. The liquid should reduce slightly, concentrating the flavors. Watch for the sauce to thicken a bit.
- Add the brown sugar and stir until it dissolves completely. This step sweetens the sauce and gives it a glossy sheen. The sugar should caramelize slightly, adding a subtle caramel note. Be careful not to over‑simmer, or the sauce will become too thick.
- Whisk the cornstarch slurry into the pan and stir vigorously for 30 seconds. The sauce should thicken and become glossy. Keep the heat on medium to allow the cornstarch to fully activate. If the sauce looks too thick, add a splash of water.
- Finally, toss in the green onions, reserving a few for garnish. Cook for an additional minute until the onions soften but still retain a bite. Remove from heat to prevent the onions from becoming mushy. Plate the dish immediately for the best texture.
That's it — you did it. But hold on, I've got a few more tricks that'll take this to another level. The sauce’s final glaze can be enhanced with a splash of toasted sesame oil, and the mushrooms can be finished with a sprinkle of toasted sesame seeds for an extra crunch. Also, serving this over steaming jasmine rice or fluffy quinoa will elevate the meal to restaurant quality.
Insider Tricks for Flawless Results
When you’re aiming for a restaurant‑style dish, every detail counts. From the heat level to the timing of each ingredient, the small nuances make a huge difference. Below are the insider tricks that will ensure your vegan Mongolian beef and mushrooms come out perfectly every time. These are not just tips; they’re the difference between good and unforgettable.
The Temperature Rule Nobody Follows
The wok must be hot enough to sear the soy chunks instantly. If the pan is only medium‑high, the chunks will steam instead of caramelizing. A quick test: flick a drop of water into the pan; if it evaporates instantly, the heat is right. Keep the temperature steady by adjusting the flame as needed. This rule guarantees a crisp exterior and a juicy interior.
Why Your Nose Knows Best
Smell is a powerful indicator of doneness. As the soy chunks sear, a nutty aroma will emerge, signaling that they’re ready. The mushrooms will emit a sweet, earthy scent once they’re caramelized. If the aroma feels underdeveloped, give them a bit more time. Your nose is the best judge of flavor depth.
The 5‑Minute Rest That Changes Everything
Letting the dish rest for 5 minutes before serving allows the sauce to settle and the flavors to meld. The rest period also lets the soy chunks reabsorb some sauce, creating a more cohesive bite. During this time, the sauce will thicken slightly, giving it that glossy finish. Skipping this step can result in a watery sauce that feels under‑seasoned.
Balancing Sweet and Salty
The ratio of brown sugar to soy sauce is crucial. Too much sugar will overpower the savory notes, while too little will leave the dish flat. A good rule of thumb is 1 tablespoon of sugar for every 4 tablespoons of soy sauce. Adjust to taste, but keep the balance in mind. This trick ensures a harmonious flavor profile.
Stirring Technique for a Glaze
Stirring too vigorously can break down the cornstarch, making the sauce cloudy. Instead, stir gently but continuously until the sauce thickens. Use a wooden spoon or spatula to keep the sauce moving without over‑agitating. This technique keeps the glaze silky and prevents clumping.
Creative Twists and Variations
This recipe is a playground. Here are some of my favorite ways to switch things up: 1 add a handful of baby bok choy for extra greens, 2 swap soy chunks for marinated tempeh for a different texture, 3 drizzle a little sesame oil at the end for nutty aroma, 4 sprinkle toasted sesame seeds for crunch, and 5 finish with a squeeze of lime to brighten the dish. Each variation opens a new flavor door while keeping the core of the dish intact.
Baby Bok Choy Boost
Incorporating baby bok choy adds a mild, slightly sweet flavor that pairs well with the savory sauce. The crispness of the bok choy provides a refreshing contrast to the chewy soy chunks. Add the bok choy during the last minute of cooking to keep it tender yet crisp. This variation is perfect for those who love a bit of green in their dish.
Tempeh Transformation
Marinated tempeh offers a firmer texture and a nutty undertone that complements the sauce. Slice the tempeh thinly to ensure it cooks quickly and absorbs the flavors. Marinate in soy sauce and ginger for at least 30 minutes before cooking. This swap gives the dish a different protein profile while maintaining its heartiness.
Sesame Sensation
A drizzle of toasted sesame oil at the end adds a fragrant, nutty aroma that elevates the dish. The oil’s smoke point is high enough to withstand the residual heat without burning. Use a light hand; a few drops are enough to transform the flavor. This simple tweak feels like a gourmet touch.
Crunchy Sesame Surprise
Toss in toasted sesame seeds just before serving for a delightful crunch. The seeds add a subtle nutty flavor and a visual pop of color. They also enhance the dish’s overall texture profile. Sprinkle them generously for the best effect.
Lime Brightness
A squeeze of fresh lime juice brightens the sauce and cuts through the richness. The acidity balances the sweetness of the brown sugar and the saltiness of the soy. Add the lime juice after removing the dish from heat to preserve its bright flavor. This variation is ideal for those who enjoy a citrus kick.
Storing and Bringing It Back to Life
After you’ve savored the first plate, you’ll likely want to keep the leftovers on hand for later. The key to maintaining flavor and texture is proper storage. Below are the best practices for fridge and freezer storage, as well as reheating techniques that keep the dish delicious.
Fridge Storage
Store the dish in an airtight container in the refrigerator for up to 3 days. The sauce will thicken slightly as it cools, but it remains flavorful. When ready to eat, reheat on the stovetop or in the microwave, adding a splash of water if the sauce seems thick. This method preserves the dish’s integrity.
Freezer Friendly
The dish freezes well for up to 2 months. Portion it into individual servings for convenience. Freeze in a freezer‑safe container or resealable bag. When reheating, thaw overnight in the refrigerator and then reheat on low heat, stirring frequently. The sauce will regain its silky texture.
Best Reheating Method
Reheating on the stovetop over low heat is the best way to restore the sauce’s gloss. Add a small amount of water or broth to loosen the sauce if it has thickened. Stir gently until heated through, ensuring the soy chunks stay moist. Avoid high heat, which can dry out the dish.